สวัสดีครับ บทความนี้เป็นบทความที่ 26 แล้วนะครับ ที่ผมจะมาเขียน ในซีรีย์ Learn 30 Android Libraries in 30 days
สำหรับบทความทั้งหมด อ่านได้จากด้านล่างครับ
- Day 1 : AndroidStaggered Grid
- Day 2 : Paralloid
- Day 3 : Retrofit
- Day 4 : SwipeRefreshLayout
- Day 5 : Android GraphView
- Day 6 : Holo Color Picker
- Day 7 : Android Async Http
- Day 8 : Crashlytics
- Day 9 : Butter Knife
- Day 10 : Android Annotations
- Day 11 : DateTimePicker
- Day 12 : Circular Progress Button
- Day 13 : ViewPager
- Day 14 : ViewPagerIndicator
- Day 15 : FadingActionBar
- Day 16 : AutofitTextView
- Day 17 : SwipeListView
- Day 18 : ShowcaseView
- Day 19 : GreenDAO
- Day 20 : AndroidViewAnimation
- Day 21 : ActiveAndroid
- Day 22 : Twitter4J
- Day 23 : ListViewAnimations
- Day 24 : AndEngine
- Day 25 : EazeGraph
- Day 26 : Cardslib
- Day 27 : AdapterKit
- Day 28 : WeatherLib
- Day 29 : FlatUI
- Day 30 : Android Firebase
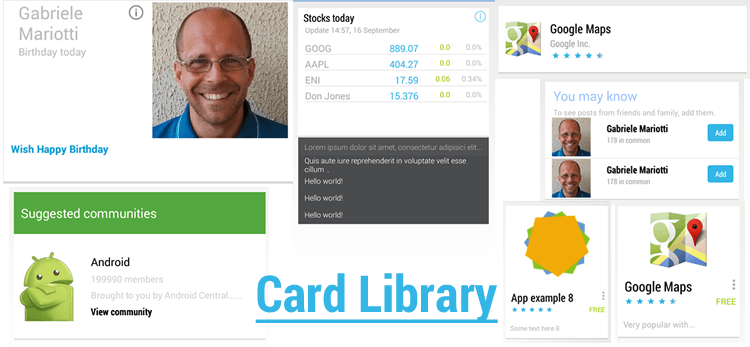
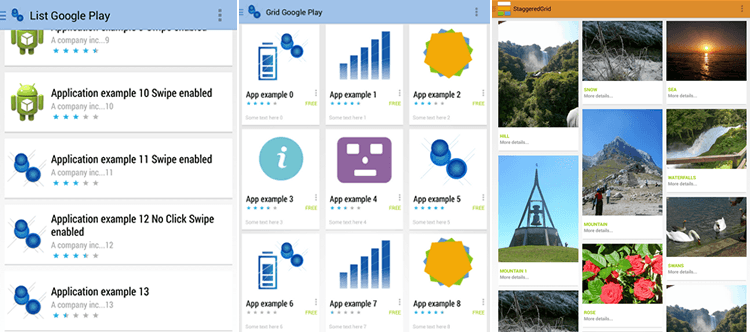
สำหรับวันนี้ขอนำเสนอเรื่อง Cardslib เป็น Library ที่เอาไว้ปรับแต่งหน้า UI ของเราให้มีลักษณะแบบ Card มีทั้งแบบ Card, แบบ List, Grid หรือ staggered grid ตัวอย่างก็ประมาณนี้
Installation
ขั้นตอนการติดตั้ง เปิดไฟล์ build.gradle ขึ้นมา แล้วเพิ่ม dependencies ลงไปดังนี้
dependencies { compile 'com.github.gabrielemariotti.cards:library:1.8.0'}กด Sync Gradle เป็นอันเรียบร้อย
Usage
Card
การสร้าง Card มีส่วนที่จำเป็น 2 อย่างครับ คือ
Card: เปรียบเสมือน View ตัวหนึ่ง ที่เอาไว้แสดงข้อมูลภายใน Card ของเราCardView: อันนี้เปรียบเสมือน ViewGroup เ่ช่นพวก LinearLayout, RelativeLayout
การใช้งาน Card ทำได้โดยเริ่มแรก ประกาศ CardView ไว้ที่ไฟล์ xml ก่อน ดังนี้
<it.gmariotti.cardslib.library.view.CardView android:id="@+id/card" android:layout_width="match_parent" android:layout_height="wrap_content" android:layout_marginLeft="12dp" android:layout_marginRight="12dp" android:layout_marginTop="12dp"/>ต่อมาภายในคลาส Java ทำการ binding CardView จากนั้น ก็ setCard() โดยใช้ Card ที่สร้างขึ้น ดังนี้
CardView cardView = (CardView) getActivity().findViewById(R.id.card);
Card card = new Card(this); // this คือ ContextcardView.setCard(card);
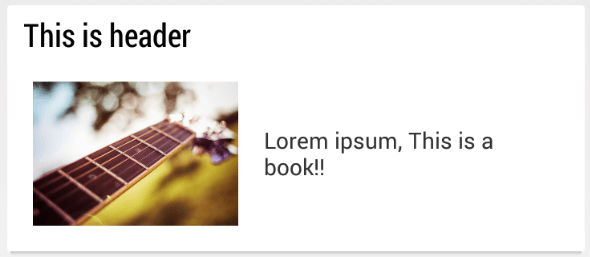
เรายังสามารถ setTitle() , setHeader() ให้กับ Card ได้ครับ เช่น
CardHeader cardHeader = new CardHeader(this);cardHeader.setTitle("This is header");
card.setTitle("This is Title of Card");card.addCardHeader(cardHeader);
ส่วนวิธีการใส่ content เข้าไปใน Card ทำได้โดยการประกาศ Layout ขึ้นมาไฟล์นึง สมมติผมสร้างไฟล์ xml ขึ้นมาใหม่ ชื่อ list_item_card.xml ข้างในมี ImageView และ TextView ดังนี้
<?xml version="1.0" encoding="utf-8"?>
<RelativeLayout xmlns:android="http://schemas.android.com/apk/res/android"              android:padding="16dp"              android:layout_width="match_parent"              android:layout_height="match_parent">
    <RelativeLayout        android:layout_width="wrap_content"        android:layout_height="wrap_content"        android:layout_centerInParent="true">
        <ImageView            android:id="@+id/image"            android:background="@drawable/guitar"            android:scaleType="center"            android:layout_width="128dp"            android:layout_height="90dp"            android:layout_alignParentTop="true"/>
        <TextView            android:layout_toRightOf="@id/image"            android:id="@+id/title"            android:layout_centerInParent="true"            android:text="@string/app_name"            android:layout_marginLeft="16dp"            android:layout_width="wrap_content"            android:layout_height="wrap_content"/>    </RelativeLayout></RelativeLayout>
จากนั้น Card ทำการสร้าง โดยส่ง id คือ Layout ที่เพิ่งสร้าง เช่น
Card card = new Card(this, R.layout.day26_list_item_cards);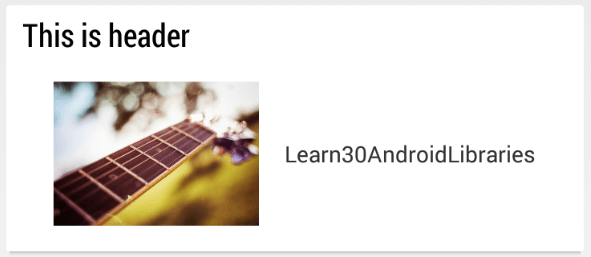
Custom Card
ทีนี้ถ้าอยากจะทำการแก้ไข Layout ภายใน Card ทำยังไง? ก็ต้องสร้าง Custom Card ของเราขึ้นมาเองครับ โดยทำการ extends Card แล้วแก้ไขที่เมธอด setupInnerViewElements แบบนี้
package com.devahoy.learn30androidlibraries.day26;
import android.content.Context;import android.view.Gravity;import android.view.View;import android.view.ViewGroup;import android.widget.TextView;
import com.devahoy.learn30androidlibraries.R;
import it.gmariotti.cardslib.library.internal.Card;

public class MyCard extends Card {
    public MyCard(Context context) {        super(context, R.layout.list_item_card);    }
    public MyCard(Context context, int innerLayout) {        super(context, innerLayout);    }
    @Override    public void setupInnerViewElements(ViewGroup parent, View view) {
        TextView title = (TextView) view.findViewById(R.id.title);        title.setText("Lorem ipsum, This is a book!!");    }}
ด้านบนเป็นการสร้างคลาสชื่อว่า MyCard ต้องมี default Constructor 2 ตัวนะครับ เอาไว้สร้างออปเจ็ค 2 แบบ เหมือนตอนสร้าง new Card(Context) และ new Card(Context, Layout) ส่วนเมธอด setupInnerViewElements ก็ทำการหา View โดย ชื่อ title มันก็คือ TextView ที่ประกาศไว้ในไฟล์ `list_item_card.xml จากนั้นก็เปลี่ยน Text มันใหม่ครับ
CardList
CardList คือ Card ที่เรียงกันเป็น List เหมือนอย่าง ListView ส่วนที่จำเป็นในการสร้าง CardList คือ
CardArrayAdapter: เป็น Adapter ที่เอาไว้กำหนด data และ LayoutCardListView: เป็นเหมือน Custom ListView คุณสมบัติเหมือนกับ ListView
การใช้งาน ก็สร้างไฟล์ขึ้นมา 1 ไฟล์ กำหนด CardListView ลงไป เช่น
<it.gmariotti.cardslib.library.view.CardListView android:layout_width="match_parent" android:layout_height="match_parent" android:id="@+id/card_list"/>ส่วนภายในคลาส Java ก็สร้างดังนี้
ArrayList<Card> cards = new ArrayList<Card>();
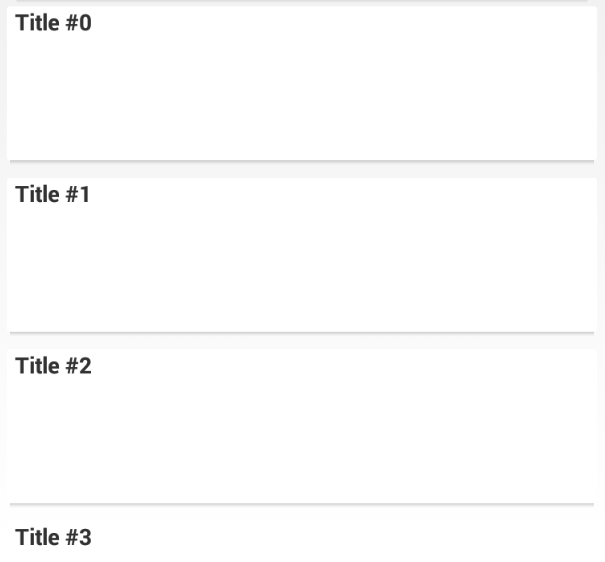
for (int i = 0; i < 5; i++) {    Card c = new Card(this);    c.setTitle("Title #" + i);    cards.add(c);}
CardArrayAdapter mCardArrayAdapter = new CardArrayAdapter(this,cards);
CardListView listView = (CardListView) findViewById(R.id.card_list);if (listView!=null){    listView.setAdapter(mCardArrayAdapter);}
ผลลัพธ์
Example
ตัวอย่าง Example อื่นๆ ของ Cardslib นะครับ อันนี้ผมยกมาจาก Docs ต้นฉบับเลย
- Google Map
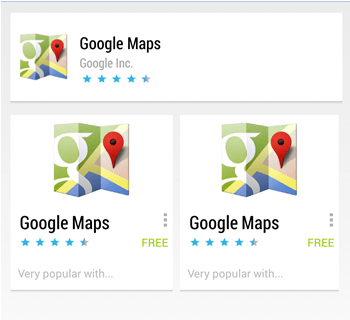
- Google Now Stock Card

- Google Play CardList
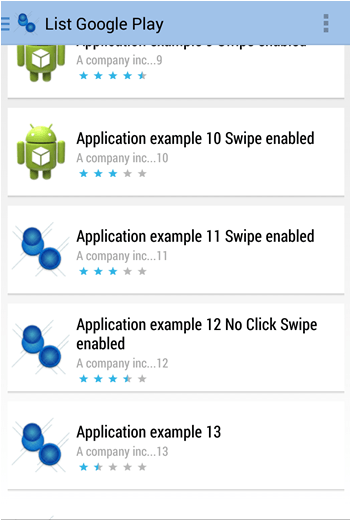
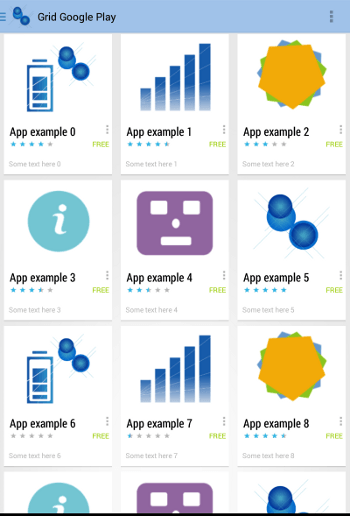
- Google Play Grid
สรุป
Cardslib เป็น Library ที่น่าใช้มากๆครับ สามารถปรับแต่งได้หลากหลาย ในบทความนี้ผมยกตัวอย่างคร่าวๆครับ ทำหมดคงจะไม่ไหว เพราะมันเยอะมาก อีกอย่าง ก็เพิ่งลองใช้ได้ไม่กี่ฟังค์ชั่นเอง หากใครสนใจก็ลองอ่านใน Docs เพิ่มเติมครับ มีทั้งตัวอย่าง คำอธิบาย รูปภาพ เจ้าของ Library ทำไว้ค่อนข้างดีมากครับ
Reference
Freelance
ต้องการคนช่วยพัฒนาเว็บไซต์หรือ Web App?
รับงาน Frontend, Backend, Web App, CMS, เว็บไซต์บริษัท, E-Commerce, และเชื่อมต่อ API สำหรับธุรกิจหรือทีมที่ต้องการคนช่วยพัฒนา
- Authors
-

Chai Phonbopit
Senior Software Engineer ประสบการณ์กว่า 12 ปี ด้าน Frontend: React, Next.js, Tailwind CSS และ Backend: Node.js, Express, NestJS ปัจจุบันสนใจ Astro, Cloudflare Workers และ AI Coding Tool