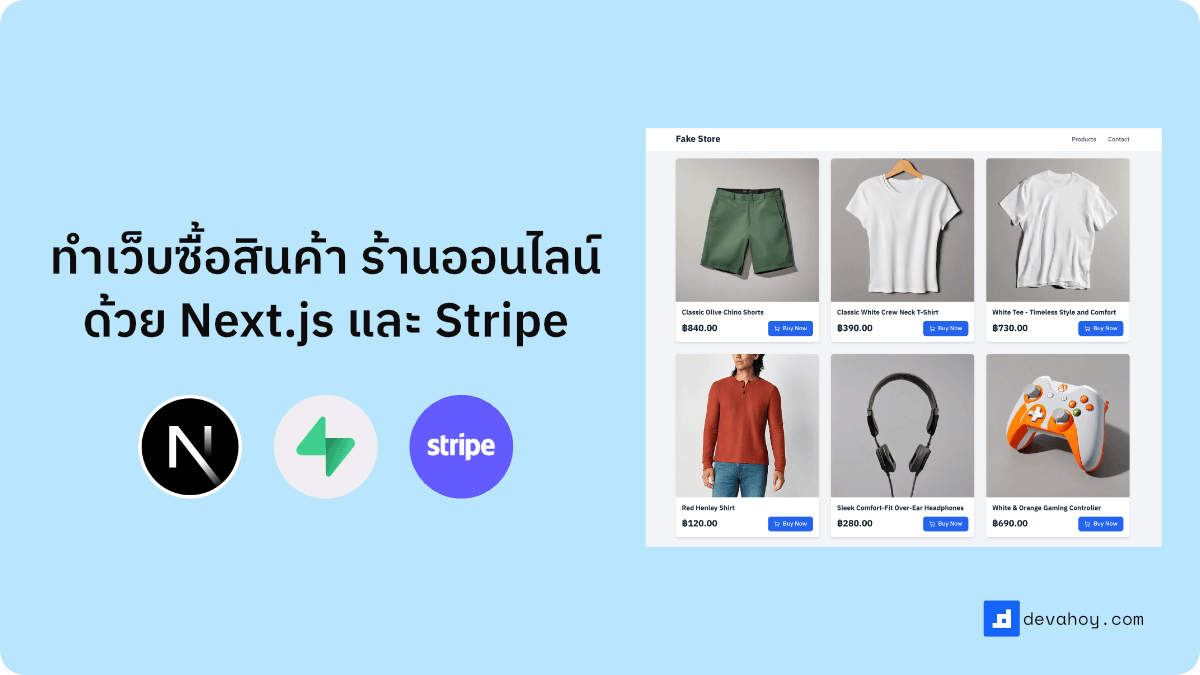
ทำระบบเว็บขายของ ซื้อสินค้า ร้านค้าออนไลน์ ด้วย Next.js + Supabase + Stripe
เวอร์ชั่นบล็อกโพส สามารถอ่านได้ที่ด้านล่าง
Step 1 : สร้างโปรเจ็ค
เริ่มต้นด้วยการสร้างโปรเจ็ค Next.js ด้วยคำสั่ง
npx create-next-app@latest eshop --typescript# หรือyarn create next-app eshop --typescriptติดตั้ง dependencies
npm install @supabase/supabase-js dotenv stripe lucide-reactnpm install -D tsxStep 2 : Supabase และ Database
import { createClient } from "@supabase/supabase-js";import "dotenv/config";
const supabaseUrl = process.env.NEXT_PUBLIC_SUPABASE_URL;const supabaseAnonKey = process.env.NEXT_PUBLIC_SUPABASE_ANON_KEY;
if (!supabaseUrl || !supabaseAnonKey) {  throw new Error("Supabase URL and Anon Key are required.");}
export const supabase = createClient(supabaseUrl, supabaseAnonKey);
ไฟล์ .env.local
NEXT_PUBLIC_SUPABASE_URL=https://your-project.supabase.coNEXT_PUBLIC_SUPABASE_ANON_KEY=your-anon-keyDatabase
-- สร้างตารางสินค้าcreate table products (  id serial primary key,  name text not null,  description text,  price numeric not null,  image_url text,  stripe_price_id text not null,  stripe_product_id text not null,  created_at timestamp default now(),  updated_at timestamp default now());
-- สร้างตาราง Ordercreate table orders (  id serial primary key,  product_id integer references products(id),  quantity integer not null,  total_amount numeric not null,  status text not null,  stripe_checkout_session_id text not null,  created_at timestamp default now(),  updated_at timestamp default now());
Step 3 : Stripe
เพิ่มในไฟล์ .env.local
STRIPE_SECRET_KEY=sk_xxxxximport Stripe from "stripe";import { supabase } from "@/lib/supabase-client";import "dotenv/config";
const stripeSecretKey = process.env.STRIPE_SECRET_KEY;
if (!stripeSecretKey) { console.error( "Stripe Secret Key is not set. Please set STRIPE_SECRET_KEY in your environment variables.", ); process.exit(1);}
const stripe = new Stripe(stripeSecretKey, { apiVersion: "2025-04-30.basil", typescript: true,});
async function main() { const res = await fetch( "https://api.escuelajs.co/api/v1/products?offset=0&limit=10", );
if (!res.ok) { console.error("Error fetching products:", res.statusText); return; } const products = await res.json();
for (const product of products) { console.log(`Product ID: ${product.id} - ${product.title}`);
try { // 1. create price & product const stripeProduct = await stripe.products.create({ name: product.title, description: product.description, images: product.images, });
// 2. create price with product id const stripePrice = await stripe.prices.create({ unit_amount: product.price * 1000, currency: "thb", product: stripeProduct.id, });
if (!stripePrice || !stripeProduct) { console.error("Error creating Stripe product or price"); continue; }
// 3. insert to supabase database. // note: ถ้าเรากำหนด RLS (Row Level Security) ไว้ใน Supabase // เราต้องให้สิทธิ์การเข้าถึงให้กับ service_role // หรือใช้ supabase.auth.admin เพื่อให้สิทธิ์การเข้าถึง // https://supabase.com/docs/guides/auth/row-level-security const { data, error: dbError } = await supabase .from("products") .insert([ { name: product.title, description: product.description, price: product.price * 1000, image_url: product.images[0], stripe_product_id: stripeProduct.id, stripe_price_id: stripePrice.id, }, ]) .select();
if (dbError) { console.error("Error inserting product into Supabase:", dbError); continue; }
console.log(`product ${product.id} initial success`, data); } catch (createError) { console.error(createError); process.exit(1); } }}
main().catch(console.error);generate product รันครั้งเดียว
npx tsx src/lib/create-stripe-products.ts
# หรือใช้ bunbun run src/lib/create-stripe-products.ts
Step 4 : หน้าแสดงสินค้า
import { supabase } from "@/lib/supabase-client";
import ProductCard from "@/components/ProductCard";import { Product } from "@/types";
const HomePage: React.FC = async () => {  return (    <section className="mx-auto max-w-7xl px-4 py-16 sm:px-6 lg:px-8">      <div className="mb-12 text-center">        <h2 className="mb-4 text-3xl font-bold text-zinc-900 md:text-4xl">          สินค้าขายดี        </h2>      </div>
      <div className="grid grid-cols-1 gap-8 sm:grid-cols-3">        {products.map((product: Product) => (          <ProductCard key={product.id} product={product} />        ))}      </div>    </section>  );};
export default HomePage;
ต่อมา products ยังไม่มีข้อมูล เราจะสร้าง function เพื่อ query product จาก supabase เป็นดังนี้
async function getProducts(): Promise<Product[]> {  // เหมือนกับ select * from products order by name ASC;  const { data: products, error } = await supabase    .from("products")    .select("*")    .order("name", { ascending: true });
  if (error) {    console.error("Error fetching products:", error);    return [];  }
  return products || [];}
ในส่วน component ก็ทำการ call getProducts()
const products = await getProducts()
return (  // code)
ต่อมาไฟล์ ProductCard.tsx
"use client";
import Image from "next/image";import { ShoppingCart } from "lucide-react";
import { Product, ProductCardProps } from "@/types";
const ProductCard: React.FC<ProductCardProps> = ({ product }) => {  return (    <div className="overflow-hidden rounded-lg bg-white shadow-md transition-shadow duration-300 hover:shadow-lg">      <div className="aspect-square overflow-hidden">        <Image          src={product.image_url}          alt={product.name}          width={300}          height={300}          className="h-full w-full object-cover transition-transform duration-300 hover:scale-105"        />      </div>
      <div className="p-4">        <h3 className="mb-2 line-clamp-2 text-lg font-semibold text-zinc-800">          {product.name}        </h3>
        <div className="flex items-center justify-between">          <span className="text-2xl font-bold text-zinc-900">            ${product.price}          </span>
          <button className="flex cursor-pointer items-center gap-2 rounded-lg bg-blue-600 px-4 py-2 font-medium text-white transition-colors duration-200 hover:bg-blue-700">            <ShoppingCart className="h-4 w-4" />            Buy Now          </button>        </div>      </div>    </div>  );};
export default ProductCard;
ไฟล์ types.ts
export interface Product {  id: string;  name: string;  description: string;  price: number;  image_url: string;  stripe_price_id: string;}
export interface ProductCardProps {  product: Product;}
ไฟล์ globals.css
@tailwind base;@tailwind components;@tailwind utilities;Step 5: ทำ API Checkout
import { NextResponse } from "next/server";import Stripe from "stripe";
const STRIPE_SECRET_KEY = process.env.STRIPE_SECRET_KEY;
if (!STRIPE_SECRET_KEY) {  throw new Error("Stripe secret key must be provided");}
const stripe = new Stripe(STRIPE_SECRET_KEY, {  apiVersion: "2025-04-30.basil",  typescript: true,});
export async function POST(request: Request) {  try {    const {      stripePriceId,      price,      productId,      quantity = 1,    } = await request.json();
    if (!stripePriceId || !price || !productId) {      return NextResponse.json(        { error: "stripePriceId or price or productId is required" },        { status: 400 },      );    }
    const origin = request.headers.get("origin") || "http://localhost:3000";
    const session = await stripe.checkout.sessions.create({      line_items: [        {          price: stripePriceId,          quantity,        },      ],      metadata: {        productId,        price: price.toString(),        quantity: quantity.toString(),      },      mode: "payment",      success_url: `${origin}/payment-success?session_id={CHECKOUT_SESSION_ID}`,      cancel_url: `${origin}/?canceled=true`,    });
    return NextResponse.json({ url: session.url });  } catch (err) {    const error = err as Error;    console.error("Error creating Stripe session:", error.message);    return NextResponse.json({ error: error.message }, { status: 500 });  }}
ไฟล์ ProductCard.tsx
import { redirect } from 'next/navigation'
const ProductCard: React.FC<ProductCardProps> = ({ product }) => {  const handleBuyProduct = async () => {    const { id: productId, price, stripe_price_id: stripePriceId } = product
    const response = await fetch('/api/checkout-session', {      method: 'POST',      headers: {        'Content-Type': 'application/json'      },      body: JSON.stringify({ stripePriceId, productId, price })    })
    if (!response.ok) {      const errorData = await response.json()      console.error('Failed to create checkout session:', errorData)      alert(`เกิดข้อผิดพลาดในการเริ่มการชำระเงิน: ${errorData.error || response.statusText}`)      return    }
    const { url, error } = await response.json()
    if (error) {      console.error('Stripe redirection error:', error)      alert(`เกิดข้อผิดพลาดในการเปิดหน้าชำระเงิน: ${error.message}`)    }
    redirect(url)  }
  return (    // ...  )}
ส่วนปุ่ม Buy Now ก็เพิ่ม onClick ลงไป เพื่อมาเรียก handleBuyProduct
<button onClick={handleBuyProduct}> <ShoppingCart className="h-4 w-4" /> Buy Now</button>import type { NextPage } from "next";import Head from "next/head";
const PaymentSuccess: NextPage = () => { return ( <div className="container mx-auto p-4 text-center"> <Head> <title>Payment Successful</title> </Head> <h1 className="mb-4 text-2xl font-bold">ชำระเงินเรียบร้อย</h1> </div> );};
export default PaymentSuccess;ไฟล์ app/api/stripe-webhooks/route.ts
import { NextResponse } from "next/server";import Stripe from "stripe";import { supabase } from "@/lib/supabase-client";
const STRIPE_SECRET_KEY = process.env.STRIPE_SECRET_KEY || "";const STRIPE_WEBHOOK_SECRET = process.env.STRIPE_WEBHOOK_SECRET || "";
if (!STRIPE_SECRET_KEY || !STRIPE_WEBHOOK_SECRET) {  throw new Error("Stripe secret key must be provided");}
// Initialize Stripeconst stripe = new Stripe(STRIPE_SECRET_KEY, {  apiVersion: "2025-04-30.basil",  typescript: true,});
export async function POST(request: Request) {  try {    const rawBody = await request.text(); // Get raw body    const signature = request.headers.get("stripe-signature") as string;
    let event: Stripe.Event;
    try {      event = stripe.webhooks.constructEvent(        rawBody,        signature,        STRIPE_WEBHOOK_SECRET,      );    } catch (err) {      const error = err as Error;      console.error(`Webhook signature verification failed: ${error.message}`);      return NextResponse.json(        { error: `Webhook Error: ${error.message}` },        { status: 400 },      );    }
    // Handle the event    switch (event.type) {      case "checkout.session.completed":        const session = event.data.object as Stripe.Checkout.Session;        console.log(`Payment successful for session ID: ${session.id}`);
        const totalAmount = (session.amount_total ?? 0) / 100;
        try {          const productId = session.metadata?.productId;          const quantity = session.metadata?.quantity;
          // 1. Find product in Supabase          const { data: productData, error: productError } = await supabase            .from("products")            .select("id, price")            .eq("id", productId)            .maybeSingle();
          if (productError || !productData) {            console.error("Supabase error ", productError);
            return NextResponse.json(              { error: "Webhook Error: Product not found" },              { status: 404 },            );          }
          // 2. Create Order record in Supabase          const { error: orderError } = await supabase.from("orders").insert([            {              product_id: productData.id,              quantity: quantity || 1,              total_amount: totalAmount,              status: "paid",              stripe_checkout_session_id: session.id,            },          ]);
          if (orderError) {            console.error("Error inserting order into Supabase:", orderError);            return NextResponse.json(              { error: `Webhook Error: ${orderError.message}` },              { status: 500 },            );          }
          console.log(`Order created successfully for session: ${session.id}`);        } catch (dbError) {          const dErr = dbError as Error;          console.error("Database operation error:", dErr.message);          return NextResponse.json(            { error: `Webhook Error: ${dErr.message}` },            { status: 500 },          );        }        break;
      default:        console.warn(`Unhandled event type ${event.type}`);    }
    return NextResponse.json({ received: true });  } catch (error) {    console.error("Error processing webhook:", error);    return NextResponse.json(      { error: "Internal Server Error processing webhook" },      { status: 500 },    );  }}
Step 7: Stripe Webhook local
ทดสอบ webhook บน local ด้วย stripe CLI
# brewbrew install stripe/stripe-cli/stripe
# scoopscoop bucket add stripe https://github.com/stripe/scoop-stripe-cli.gitscoop install stripe
ทำการ forward events มาที่ webhook ของเรา ที่สร้างไว้
stripe listen --forward-to localhost:3000/api/stripe-webhooksจะได้ค่า webhook signing secret ประมาณนี้
> Ready! You are using Stripe API Version [2023-08-16]. Your webhook signing secret is whsec_YOUR_SIGNING_SECRET_FROM_STRIPE_CLI (^C to quit)^C%นำค่าจาก Stripe CLI ไปใส่ใน .env ของเรา
STRIPE_WEBHOOK_SECRET=whsec_YOUR_SIGNING_SECRET_FROM_STRIPE_CLIทดสอบ flow การทำงานอีกครั้ง ลองทำผ่าน CLI ก็ได้ เช่น
stripe trigger checkout.session.completedStep 8: ปรับแต่ง UI
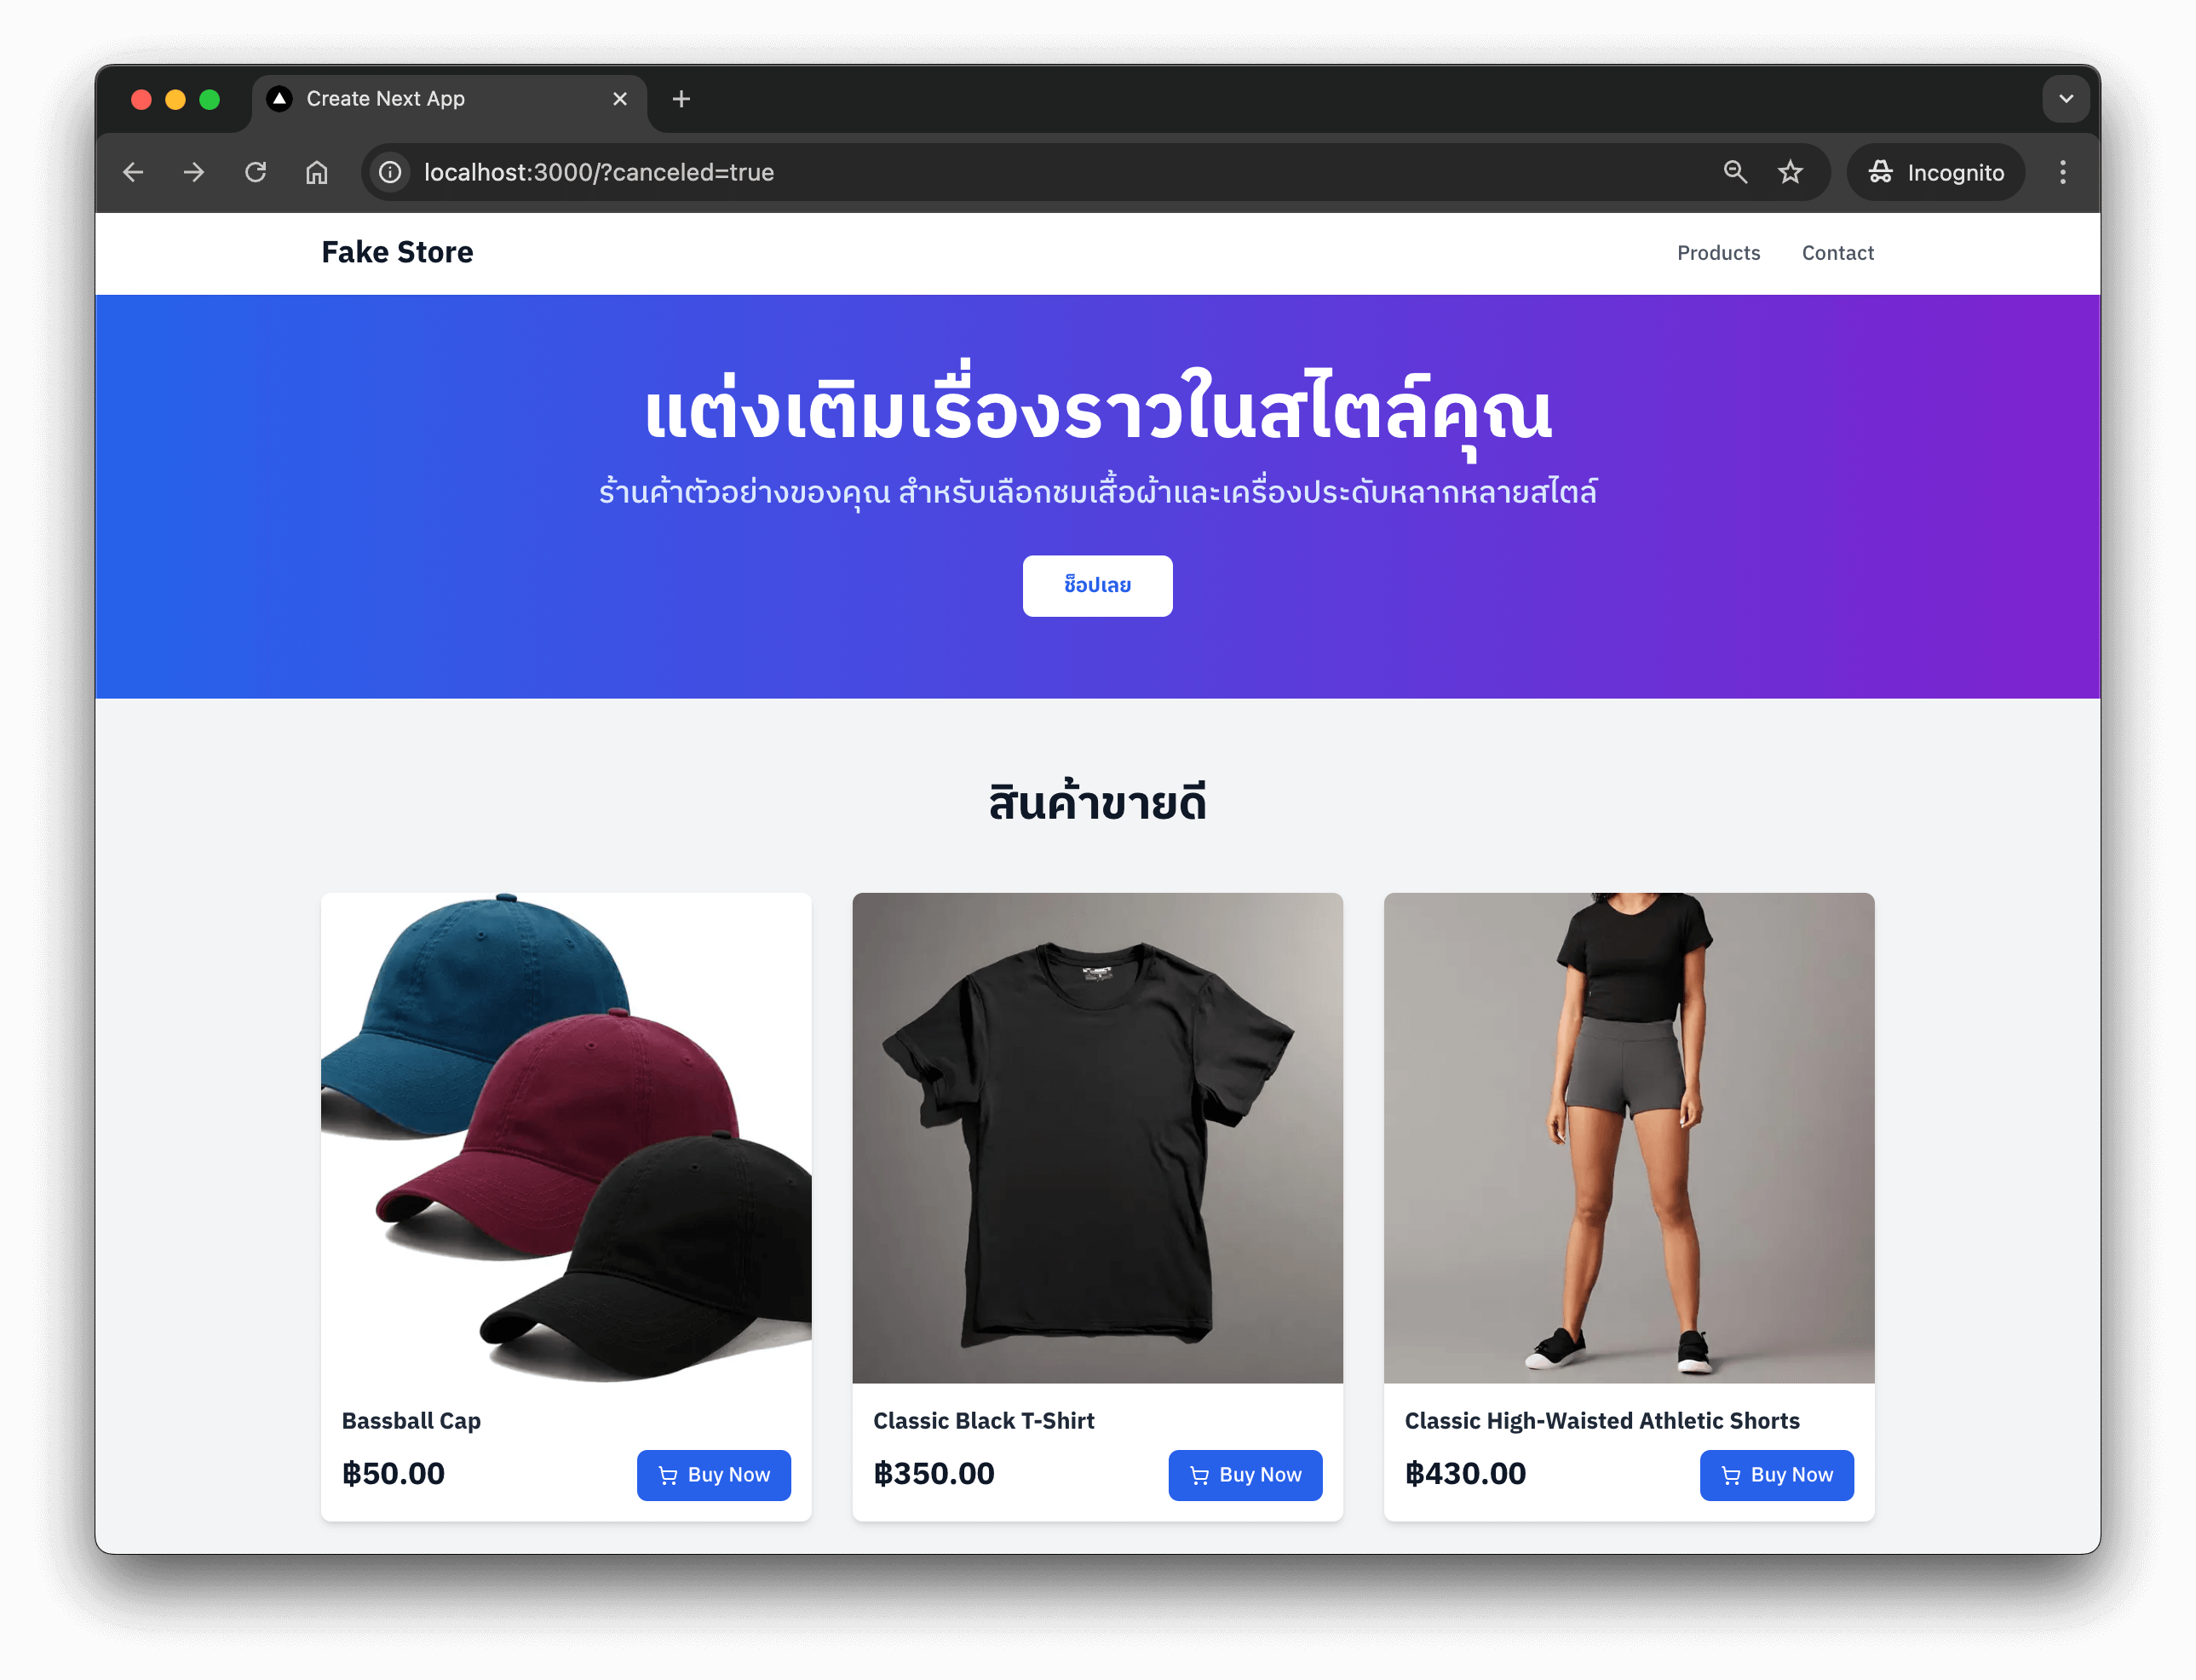
ส่วน Navbar.tsx
const Navbar = () => {  return (    <header className="sticky top-0 z-10 bg-white shadow-sm">      <div className="mx-auto max-w-7xl px-4 sm:px-6 lg:px-8">        <div className="flex h-16 items-center justify-between">          <div className="flex items-center">            <h1 className="text-2xl font-bold text-zinc-900">Fake Store</h1>          </div>
          <nav className="hidden space-x-8 md:flex">            <a              href="#"              className="font-medium text-zinc-600 hover:text-zinc-900"            >              Products            </a>
            <a              href="https://www.devahoy.com"              className="font-medium text-zinc-600 hover:text-zinc-900"              target="_blank"            >              Contact            </a>          </nav>        </div>      </div>    </header>  );};
export default Navbar;
ไฟล์ Hero.tsx
const Hero = () => {  return (    <section className="bg-gradient-to-r from-blue-600 to-purple-700 text-white">      <div className="mx-auto max-w-7xl px-4 py-16 sm:px-6 lg:px-8">        <div className="text-center">          <h2 className="mb-4 text-4xl font-bold md:text-6xl">            แต่งเติมเรื่องราวในสไตล์คุณ          </h2>          <p className="mb-8 text-xl text-blue-100 md:text-2xl">            ร้านค้าตัวอย่างของคุณ            สำหรับเลือกชมเสื้อผ้าและเครื่องประดับหลากหลายสไตล์          </p>          <button className="cursor-pointer rounded-lg bg-white px-8 py-3 font-semibold text-blue-600 transition-colors duration-200 hover:bg-zinc-100">            ช็อปเลย          </button>        </div>      </div>    </section>  );};
export default Hero;
ไฟล์ Footer.tsx
const Footer = () => { return ( <footer className="bg-zinc-900 text-white"> <div className="mx-auto max-w-7xl px-4 py-12 sm:px-6 lg:px-8"> <div className="text-center text-zinc-300"> <p> © 2025 FakeStore. อ่านบทความเต็มที่ :{" "} <a href="https://github.com/phonbopit/eshop" className="underline underline-offset-2" target="_blank" > ทำระบบเว็บขายของ E-commerce </a> </p> </div> </div> </footer> );};
export default Footer;หน้า ProductCard ตรงส่วนที่แสดงราคา ก็ปรับให้มันเป็น TH ซะ แบบนี้
{ new Intl.NumberFormat("th-TH", { style: "currency", currency: "THB", }).format(product.price / 100);}หน้า src/app/layout.tsx ปรับแต่งแบบนี้
import type { Metadata } from "next";import { IBM_Plex_Sans_Thai } from "next/font/google";import "./globals.css";import Navbar from "@/components/Navbar";import Footer from "@/components/Footer";import Hero from "@/components/Hero";
const ibmPlex = IBM_Plex_Sans_Thai({  subsets: ["thai"],  weight: ["300", "500", "700"],  display: "swap",});
export const metadata: Metadata = {  title: "Create Next App",  description: "Generated by create next app",};
export default function RootLayout({  children,}: Readonly<{  children: React.ReactNode;}>) {  return (    <html lang="en">      <body className={`${ibmPlex.className} antialiased`}>        <div className="min-h-screen bg-zinc-100">          <Navbar />          <Hero />          {children}          <Footer />        </div>      </body>    </html>  );}
🎉เสร็จเรียบร้อยครับ!
Happy Coding ❤️