- PublishedAt
ทำระบบเว็บขายของ ซื้อสินค้า ร้านค้าออนไลน์ ด้วย Next.js + Supabase + Stripe

สวัสดีครับ วันนี้เราจะมาลองสร้างเว็บขายของง่ายๆ โดยเป็นการชำระเงินผ่าน Stripe และการยืนยันการสั่งซื้อผ่าน Stripe webhook เพื่ออัปเดตข้อมูลใน Supabase กันครับ บทความนี้ เป็นคล้ายๆ Workshop ให้ลองทำ mini project จะพยายามอธิบายแบบเข้าใจง่าย เน้นภาพรวม และทำความเข้าใจให้มากที่สุดครับ เนื้อหาอาจจะไม่ได้สำหรับมือใหม่มากนัก เหมาะสำหรับคนที่มีพื้นฐานการเขียนโปรแกรมอยู่บ้างแล้ว หรือคนที่เคยใช้ Next.js, Supabase มาก่อนหน้านี้ครับ
ภาพรวมโปรเจ็ค
เป็นเว็บ E-commerce ง่ายๆ ที่แสดงรายการสินค้า และสามารถซื้อสินค้า โดยใช้ Stripe เป็น Payment gateway เพื่อชำระเงิน ตัว Tech stack ประกอบไปด้วย
- ใช้ Next.js + TypeScript เป็น Framework หลัก
- ใช้ Supabase ในการเก็บข้อมูลสินค้า และ order ต่างๆ
- ใช้ Stripe ในการชำระเงิน เป็น Payment Gateway
- ใช้ Tailwind CSS สำหรับการออกแบบ UI
สิ่งสำคัญที่ต้องมีคือ
- Supabase - มีบัญชี Supabase และสามารถสร้าง Project ได้ เข้าใจการใช้งาน Supabase เบื้องต้น
- Stripe - มีบัญชี Stripe ของตัวเอง (ในบทความนี้ ไม่พูดถึงการสร้างบัญชี Stripe นะครับ)
Step 1 : สร้างโปรเจ็ค
เริ่มต้นด้วยการสร้างโปรเจ็ค Next.js ด้วยคำสั่ง
npx create-next-app@latest eshop --typescript# หรือyarn create next-app eshop --typescriptจากนั้นก็เลือกตัวเลือกต่างๆ ตามที่เราต้องการ เช่น ESLint, Tailwind App Router ตัวอย่างเช่น
create-next-app@15.3.2Ok to proceed? (y) y
✔ Would you like to use ESLint? … No / Yes✔ Would you like to use Tailwind CSS? … No / Yes✔ Would you like your code inside a `src/` directory? … No / Yes✔ Would you like to use App Router? (recommended) … No / Yes✔ Would you like to use Turbopack for `next dev`? … No / Yes✔ Would you like to customize the import alias (`@/*` by default)? … No / Yes✔ What import alias would you like configured? … @/*Creating a new Next.js app in eshop.

cd eshop
หลังจากเลือกเสร็จ ขั้นตอนนี้แสดงว่าเรามี Next.js และ Tailwind CSS ติดตั้งเรียบร้อยแล้ว
ติดตั้ง library / dependencies ที่จะใช้ใน project เพิ่มเติม
npm install @supabase/supabase-js dotenv stripe lucide-react
npm install -D tsx
หลังจากนั้น ทดลองรันโปรเจ็คด้วยคำสั่ง
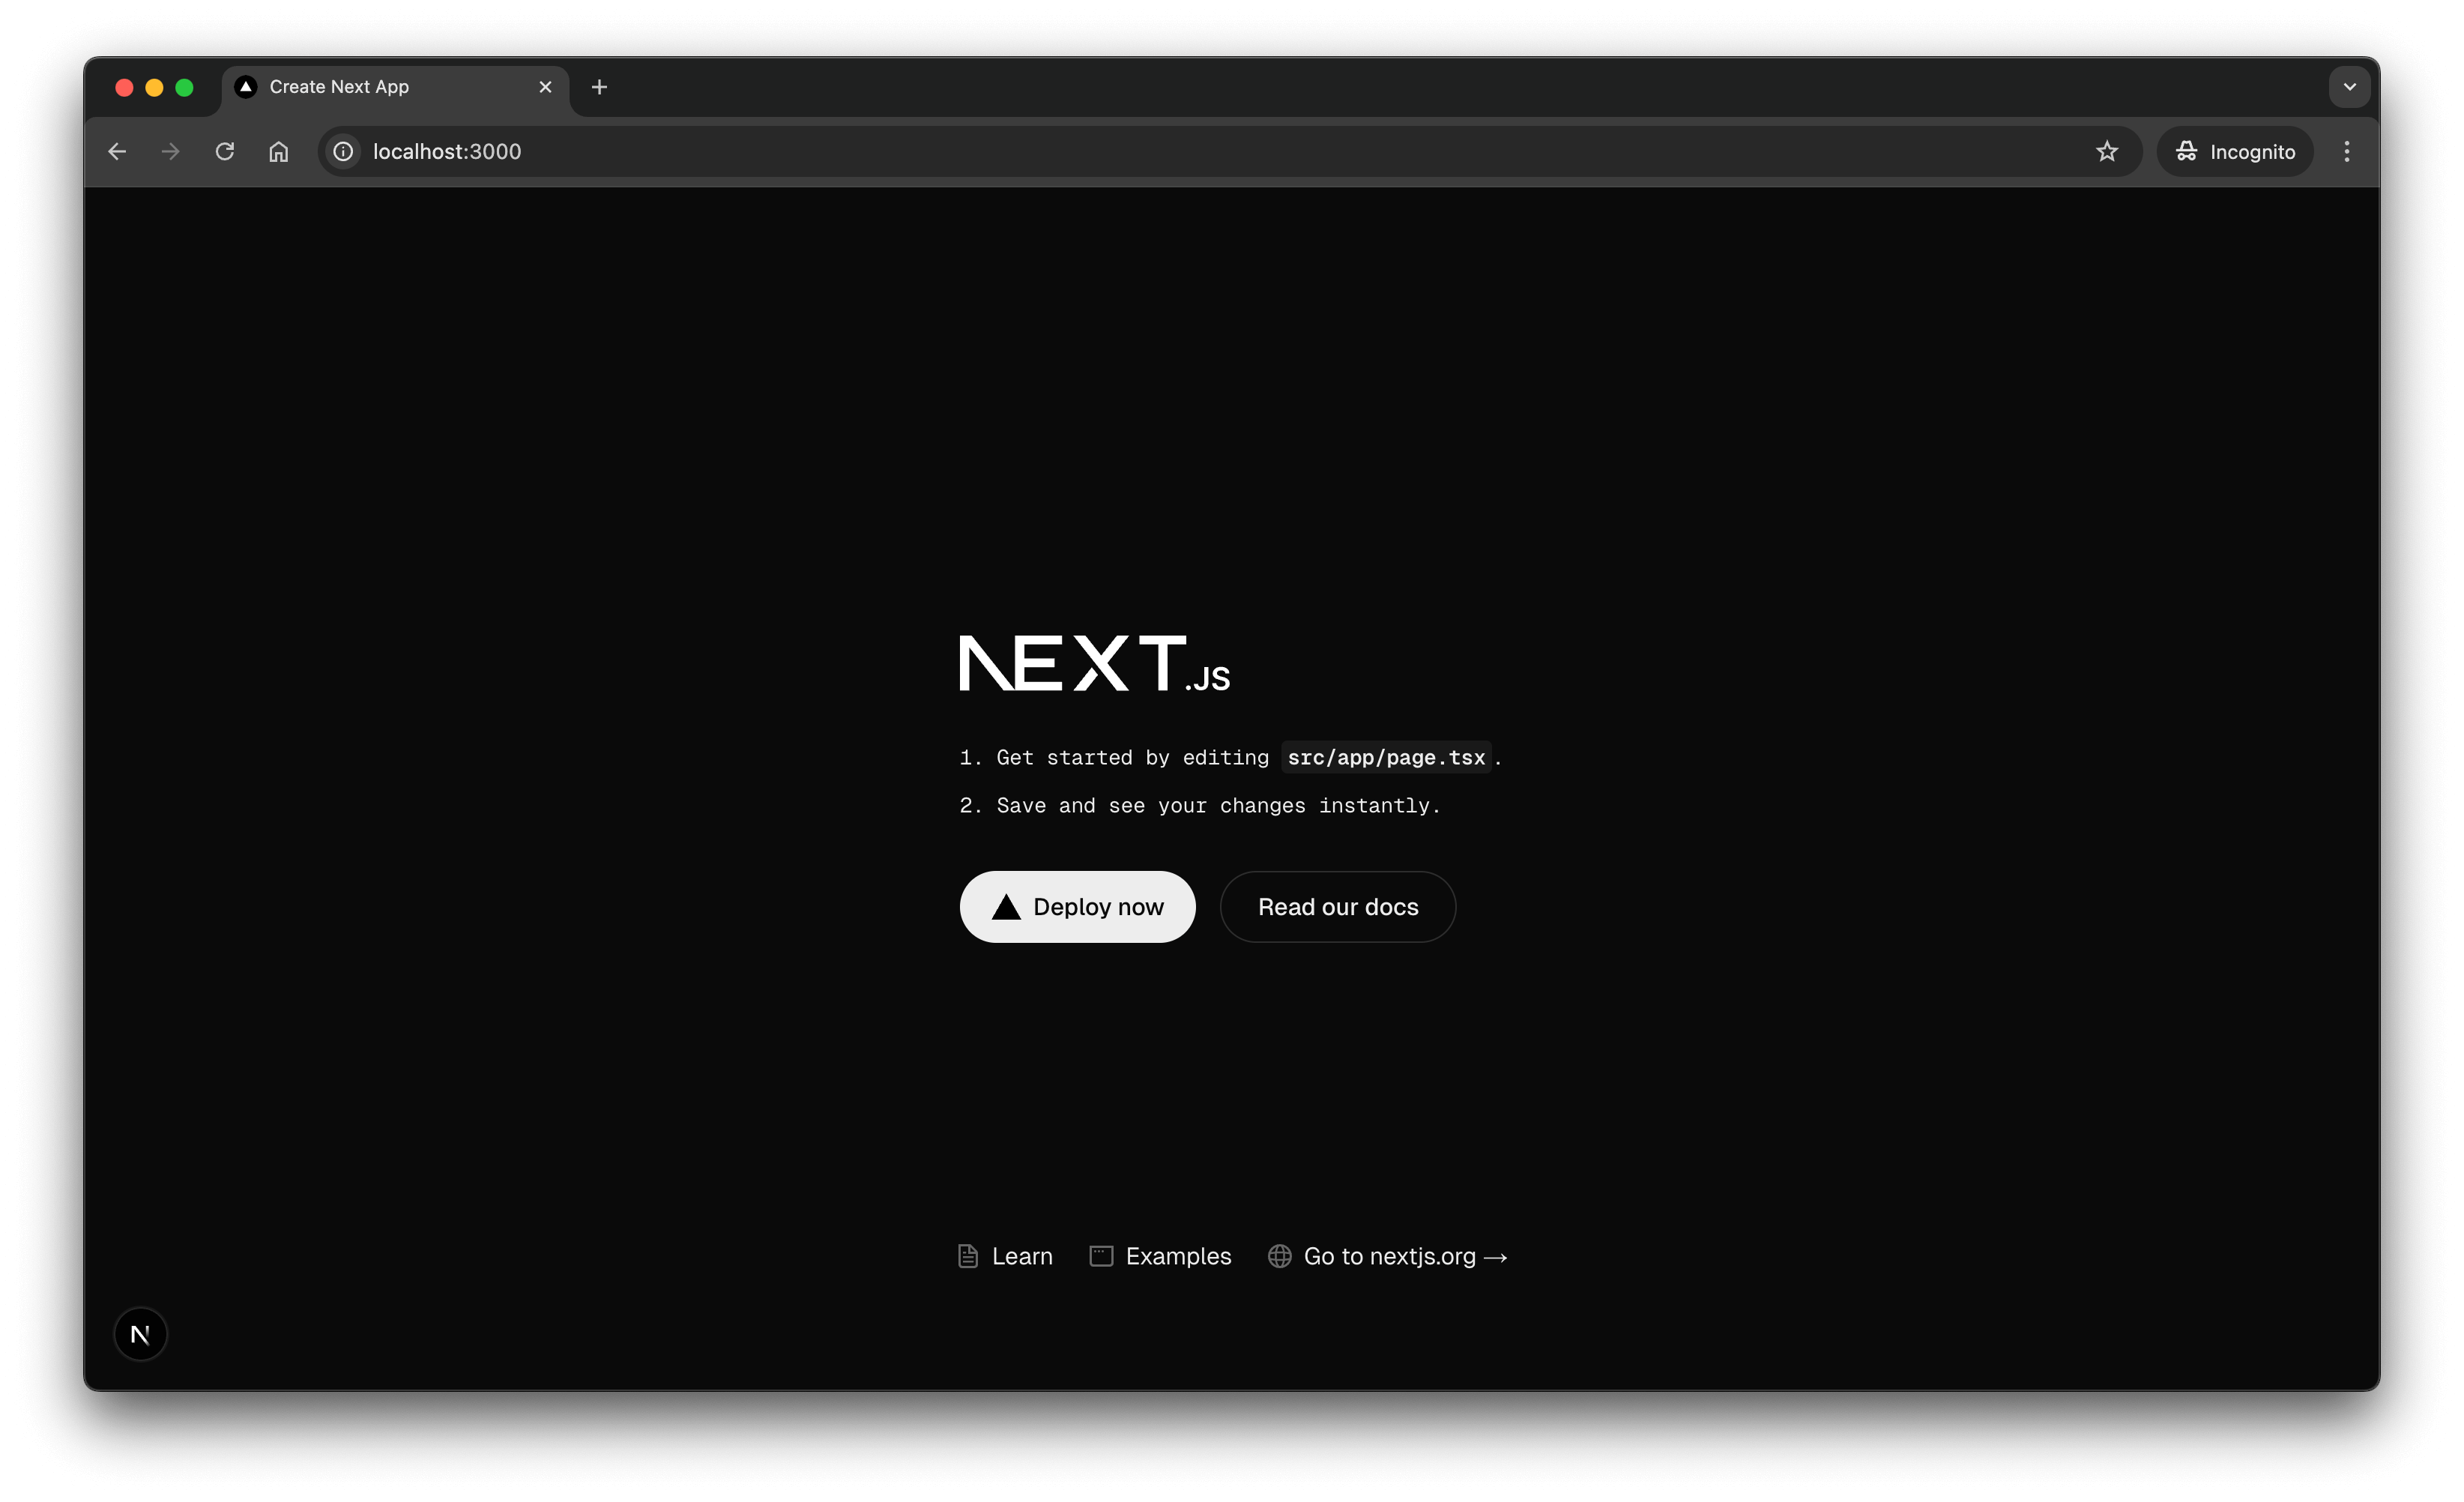
npm run devจะเห็นหน้าเว็บที่แสดงว่าโปรเจ็คทำงานได้แล้ว http://localhost:3000
Step 2 : Supabase และ Database
ไปที่ Supabase เพื่อสร้างโปรเจ็คใหม่ โดยเลือก New Project และกรอกข้อมูลต่างๆ เช่น
- Project Name - ใส่ชื่อที่ต้องการ
- Database Password - รหัสผ่านสำหรับเข้าถึงฐานข้อมูล
- Region - เลือก Region ที่ใกล้ที่สุด (แนะนำเป็น Singapore)
เมื่อเราสร้าง Project Supabase ได้แล้ว สิ่งที่เราต้องใช้ก็คือ
- Supabase Project URL - ไปหน้า Data API เลือก Project URL
- Supabase Project API Key - ไปหน้า Data API เลือก Project API Key (anon public)
กลับมาที่ตัวโปรเจ็ค สร้างไฟล์ supabase-client.tsในโฟลเดอร์ src/lib/
import { createClient } from '@supabase/supabase-js'import 'dotenv/config'
const supabaseUrl = process.env.NEXT_PUBLIC_SUPABASE_URLconst supabaseAnonKey = process.env.NEXT_PUBLIC_SUPABASE_ANON_KEY
if (!supabaseUrl || !supabaseAnonKey) {  throw new Error('Supabase URL and Anon Key are required.')}
export const supabase = createClient(supabaseUrl, supabaseAnonKey)
สร้างไฟล์ .env.local ใน root project และเพิ่มข้อมูล Supabase URL และ Key เข้าไป
NEXT_PUBLIC_SUPABASE_URL=https://your-project.supabase.coNEXT_PUBLIC_SUPABASE_ANON_KEY=your-anon-keyต่อมา ทำการสร้าง Database
ไปที่หน้า Supabase Console > SQL Editor > SQL Editor เพื่อสร้างตารางสินค้า และตาราง Order
-- สร้างตารางสินค้าcreate table products (  id serial primary key,  name text not null,  description text,  price numeric not null,  image_url text,  stripe_price_id text not null,  stripe_product_id text not null,  created_at timestamp default now(),  updated_at timestamp default now());
-- สร้างตาราง Ordercreate table orders (  id serial primary key,  product_id integer references products(id),  quantity integer not null,  total_amount numeric not null,  status text not null,  stripe_checkout_session_id text not null,  created_at timestamp default now(),  updated_at timestamp default now());
เมื่อสร้างเสร็จแล้ว เราจะได้ตาราง products และ orders ใน Supabase Console เราจะยังไม่มี data ข้ามไปก่อน เดี๋ยวกลับมาสร้าง mock data ในภายหลัง
Step 3 : Stripe
ต่อมา ในส่วนของ Stripe เราจะต้องสร้าง Product และ Price ใน Stripe Dashboard ก่อน โดยไปที่ Stripe Dashboard > Products > Create Product
สร้าง Product และ Price โดยเลือก One time สำหรับการชำระเงินครั้งเดียว
เมื่อสร้างเสร็จ เราจะได้ Price ID ซึ่งตัวนี้ เราจะเอาไปเก็บไว้ใน table products ใน Supabase และเอาไว้เป็น reference เวลาที่เราทำการสร้าง Checkout Session
สร้าง Product ด้วย Stripe SDK อีกวิธีคือ การสร้าง Product ด้วย Stripe SDK ซึ่งเราจะใช้วิธีนี้กัน อันนี้เป็น script เพื่อ initial products ขึ้นมานะครับ (รันครั้งเดียว) โดยเราจะใช้ mock api จากเว็บ fake shop api อันนี้
https://fakeapi.platzi.com/enสร้าง Stripe API Key เพื่อเอาไว้ใช้ในโปรเจ็ค (เลือก Developers -> API Keys) จากนั้น นำมาใส่ใน .env.local
STRIPE_SECRET_KEY=sk_xxxxxตัวอย่าง API เราจะเอา title, description, price, image มาสร้างเป็น Product ใน Stripe กัน
import Stripe from 'stripe'import { supabase } from '@/lib/supabase-client'import 'dotenv/config'
const stripeSecretKey = process.env.STRIPE_SECRET_KEY
if (!stripeSecretKey) {  console.error(    'Stripe Secret Key is not set. Please set STRIPE_SECRET_KEY in your environment variables.'  )  process.exit(1)}
const stripe = new Stripe(stripeSecretKey, {  apiVersion: '2025-04-30.basil',  typescript: true})
async function main() {  const res = await fetch('https://api.escuelajs.co/api/v1/products?offset=0&limit=10')
  if (!res.ok) {    console.error('Error fetching products:', res.statusText)    return  }  const products = await res.json()
  for (const product of products) {    console.log(`Product ID: ${product.id} - ${product.title}`)
    try {      // 1. create price & product      const stripeProduct = await stripe.products.create({        name: product.title,        description: product.description,        images: product.images      })
      // 2. create price with product id      const stripePrice = await stripe.prices.create({        unit_amount: product.price * 1000,        currency: 'thb',        product: stripeProduct.id      })
      if (!stripePrice || !stripeProduct) {        console.error('Error creating Stripe product or price')        continue      }
      // 3. insert to supabase database.      // note: ถ้าเรากำหนด RLS (Row Level Security) ไว้ใน Supabase      // เราต้องให้สิทธิ์การเข้าถึงให้กับ service_role      // หรือใช้ supabase.auth.admin เพื่อให้สิทธิ์การเข้าถึง      // https://supabase.com/docs/guides/auth/row-level-security      const { data, error: dbError } = await supabase        .from('products')        .insert([          {            name: product.title,            description: product.description,            price: product.price * 1000,            image_url: product.images[0],            stripe_product_id: stripeProduct.id,            stripe_price_id: stripePrice.id          }        ])        .select()
      if (dbError) {        console.error('Error inserting product into Supabase:', dbError)        continue      }
      console.log(`product ${product.id} initial success`, data)    } catch (createError) {      console.error(createError)      process.exit(1)    }  }}
main().catch(console.error)
เนื่องจากสังเกต price จาก api มันเป็นหน่วย USD ผมก็เลย x1000 เพื่อให้มันเป็น THB แบบเก็บ 0 2ตัว (สตางค์) คร่าวๆนะครับ ไม่ได้เป๊ะๆ เป็นแค่ mock data
รันด้วยคำสั่ง tsx
npx tsx src/lib/create-stripe-products.ts
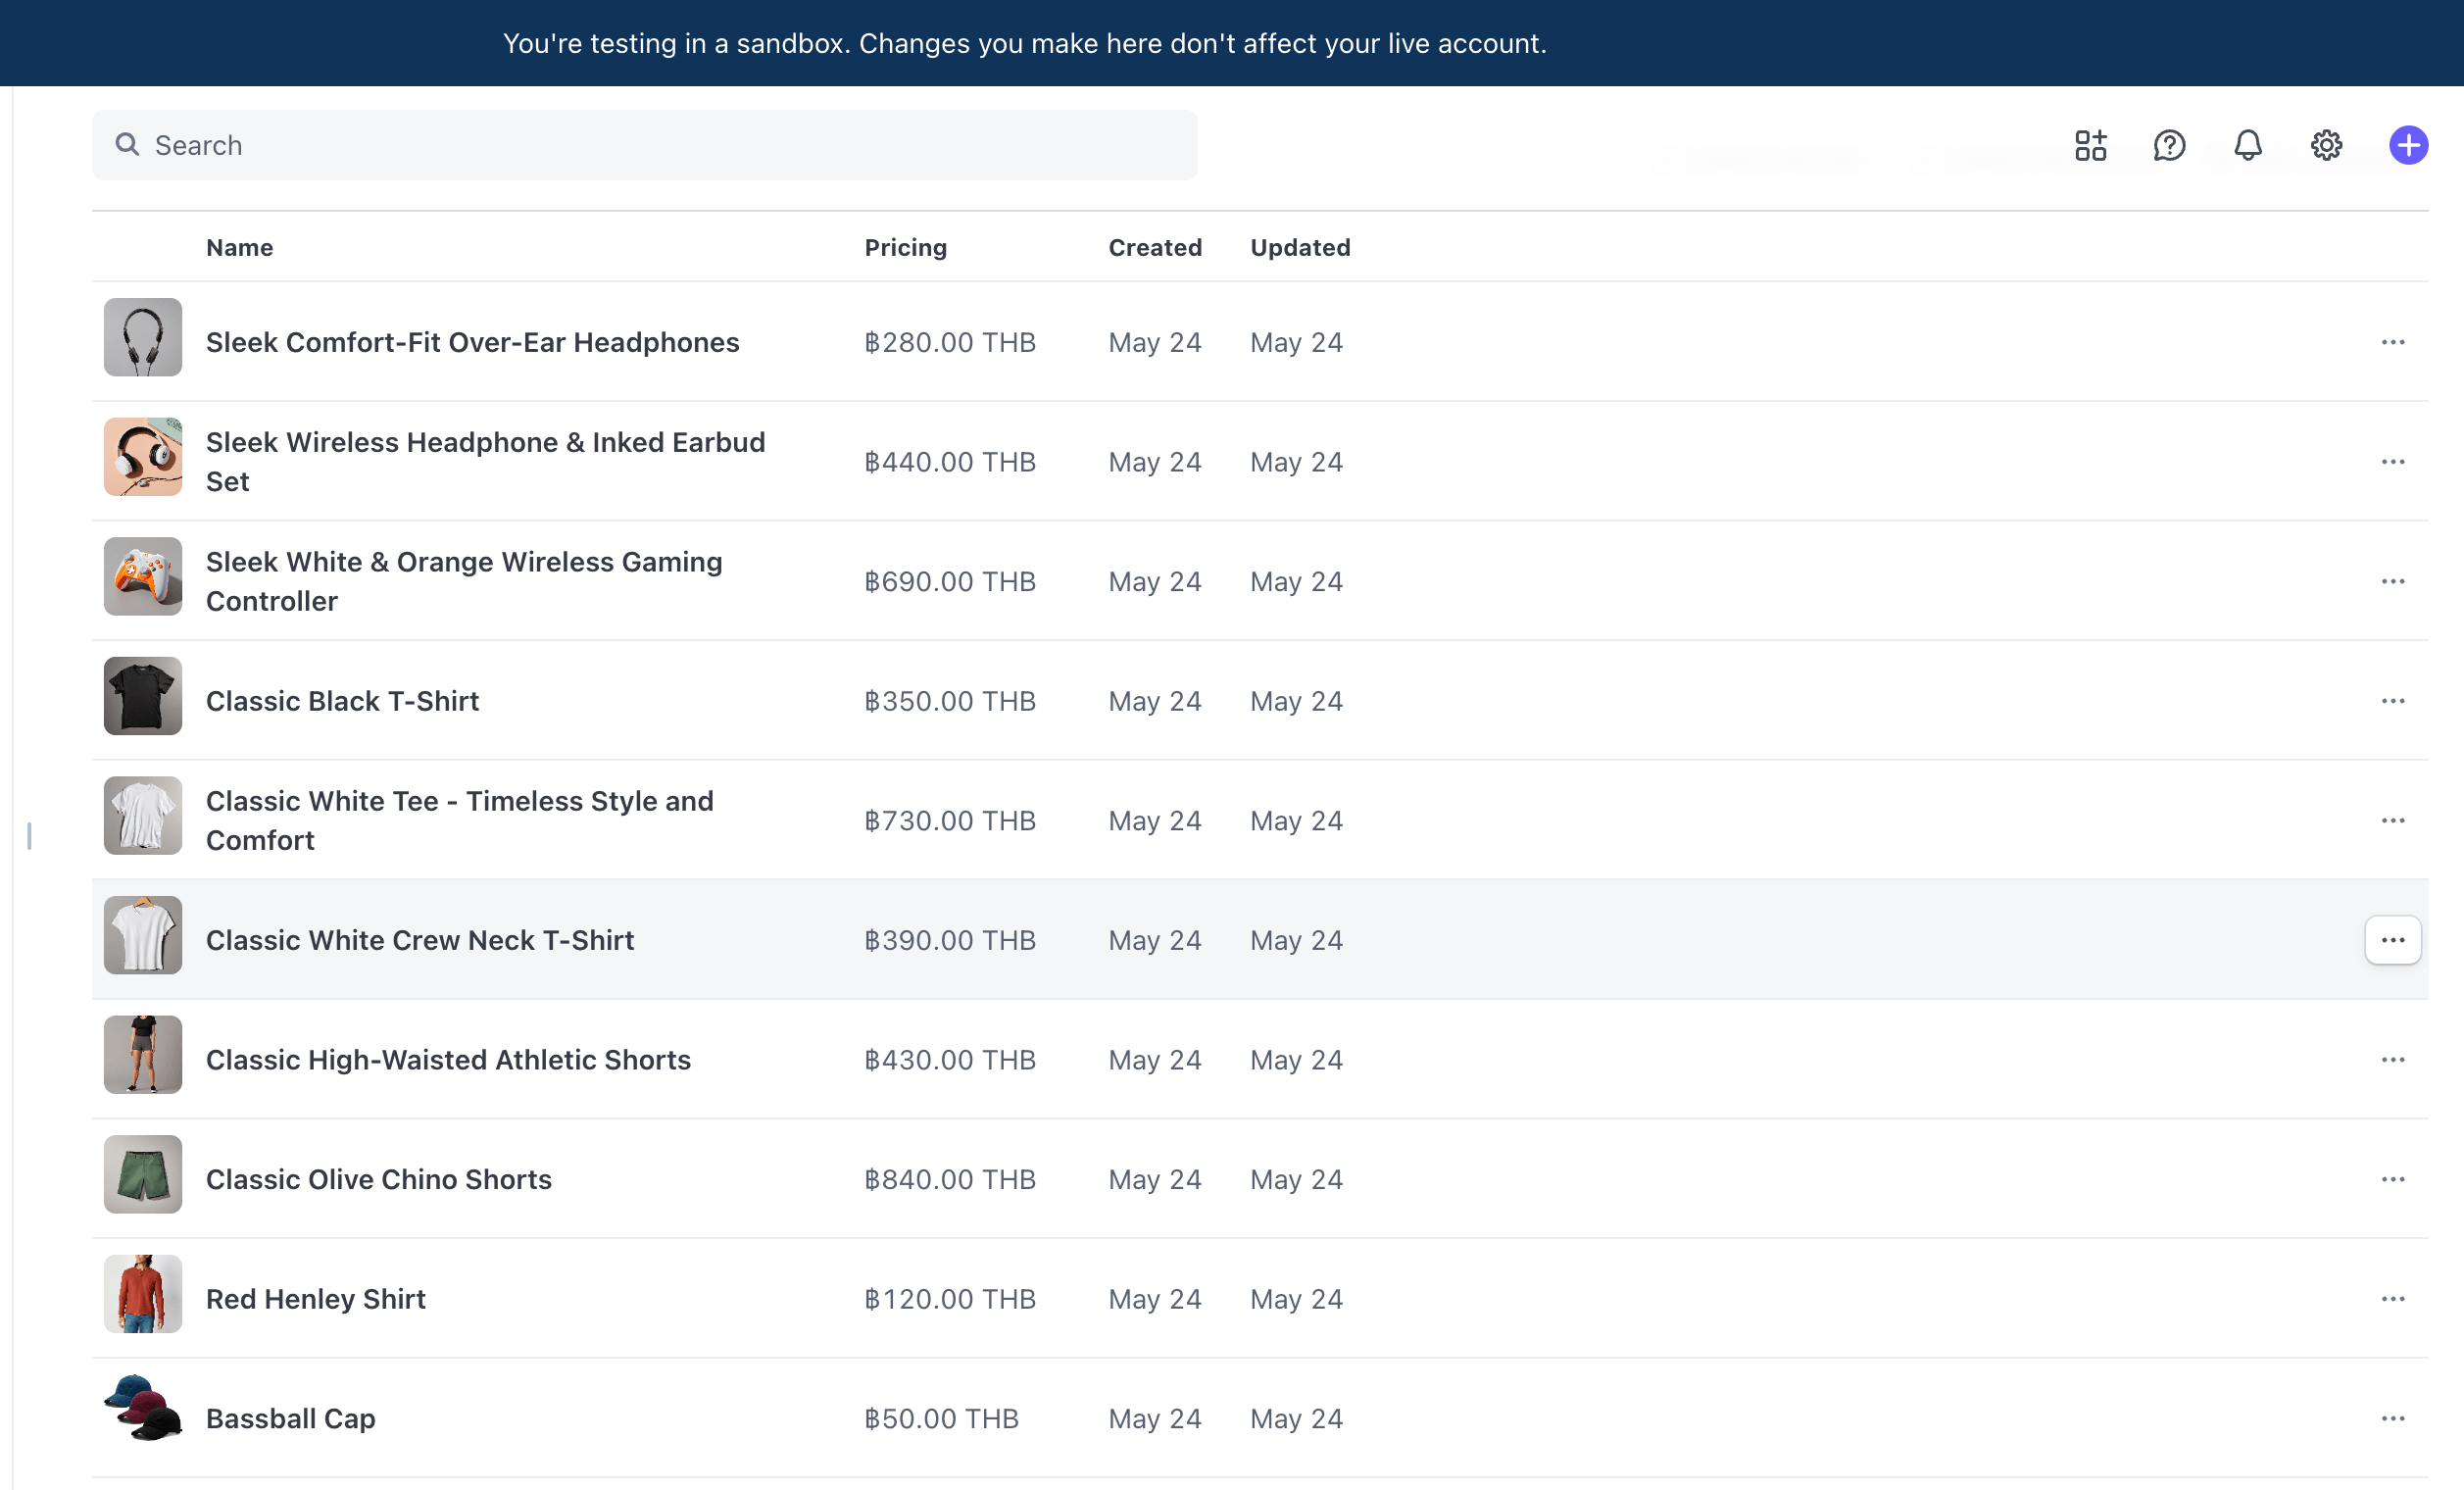
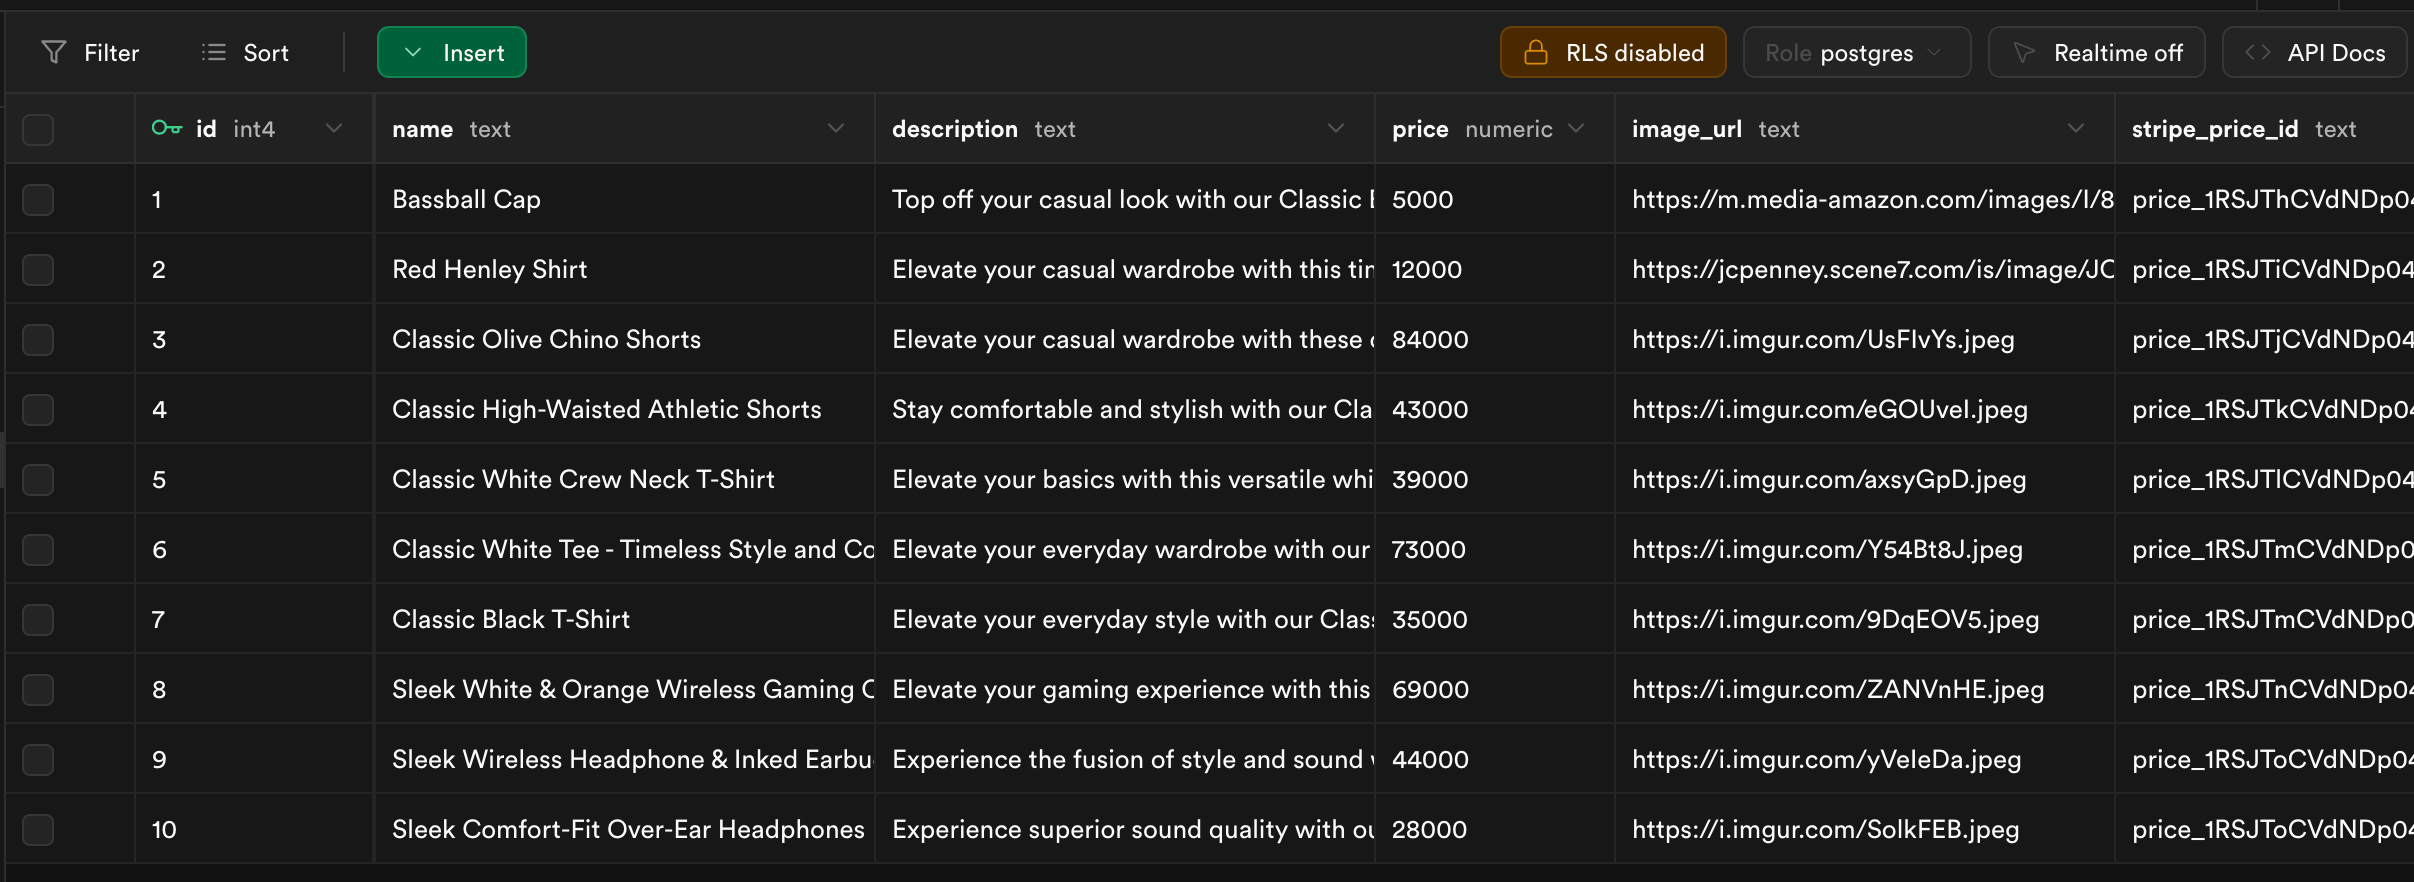
# หรือใช้ bunbun run src/lib/create-stripe-products.tsเมื่อรัน script มันจะทำการสร้าง product ไปที่ Stripe และก็ insert data ไปที่ Supabase ของเรา ลองตรวจสอบข้อมูลใน Stripe dashboard และ Supabase Database ดูครับ
Step 4 : หน้าแสดงสินค้า
ต่อมา เมื่อเรามีข้อมูลเรียบร้อยแล้ว เราจะทำการดึงข้อมูลมาแสดงที่หน้าเว็บของเรา (ตัวอย่าง ผมใช้หน้า index เป้นหน้าแสดง products เลยนะครับ) ด้านล่างเป็น markup ข้อมูล mock ขึ้นมานะครับ
import { supabase } from '@/lib/supabase-client'
import ProductCard from '@/components/ProductCard'import { Product } from '@/types'
const HomePage: React.FC = async () => {  return (    <section className="mx-auto max-w-7xl px-4 py-16 sm:px-6 lg:px-8">      <div className="mb-12 text-center">        <h2 className="mb-4 text-3xl font-bold text-zinc-900 md:text-4xl">สินค้าขายดี</h2>      </div>
      <div className="grid grid-cols-1 gap-8 sm:grid-cols-3">        {products.map((product: Product) => (          <ProductCard key={product.id} product={product} />        ))}      </div>    </section>  )}
export default HomePage
ต่อมา products ยังไม่มีข้อมูล เราจะสร้าง function เพื่อ query product จาก supabase เป็นดังนี้
async function getProducts(): Promise<Product[]> {  // เหมือนกับ select * from products order by name ASC;  const { data: products, error } = await supabase    .from('products')    .select('*')    .order('name', { ascending: true })
  if (error) {    console.error('Error fetching products:', error)    return []  }
  return products || []}
ในส่วน component ก็ทำการ call getProducts()
const products = await getProducts()
return (  // code)
ต่อมาไฟล์ component ProductCard.tsx ให้ทำการสร้างไว้ในโฟลเดอร์ src/components (ถ้าไม่มีก็สร้าง components ขึ้นใหม่)
'use client'
import Image from 'next/image'import { ShoppingCart } from 'lucide-react'
import { Product, ProductCardProps } from '@/types'
const ProductCard: React.FC<ProductCardProps> = ({ product }) => {  return (    <div className="overflow-hidden rounded-lg bg-white shadow-md transition-shadow duration-300 hover:shadow-lg">      <div className="aspect-square overflow-hidden">        <Image          src={product.image_url}          alt={product.name}          width={300}          height={300}          className="h-full w-full object-cover transition-transform duration-300 hover:scale-105"        />      </div>
      <div className="p-4">        <h3 className="mb-2 line-clamp-2 text-lg font-semibold text-zinc-800">{product.name}</h3>
        <div className="flex items-center justify-between">          <span className="text-2xl font-bold text-zinc-900">${product.price}</span>
          <button className="flex cursor-pointer items-center gap-2 rounded-lg bg-blue-600 px-4 py-2 font-medium text-white transition-colors duration-200 hover:bg-blue-700">            <ShoppingCart className="h-4 w-4" />            Buy Now          </button>        </div>      </div>    </div>  )}
export default ProductCard
ไฟล์ types.ts
export interface Product {  id: string  name: string  description: string  price: number  image_url: string  stripe_price_id: string}
export interface ProductCardProps {  product: Product}
หากใครติดปัญหา /next/image/, hostname "xxxx" is not configured under images ให้เพิ่ม domains ของรูปภาพที่ไฟล์ next.config.ts แบบนี้ (เนื่องจากเราใช้ Fake API ตัว image_url อาจจะมีบาง domain ที่เราไม่ได้เพิ่มไว้)
// import type { NextConfig } from 'next'
const nextConfig: NextConfig = {  images: {    domains: ['m.media-amazon.com', 'jcpenney.scene7.com', 'i.imgur.com']  }}
export default nextConfig
ต่อมา ผมทำการลบพวก dark theme ที่ให้มาตอนเริ่มต้นในไฟล์ globals.css ให้เหลือแค่นี้
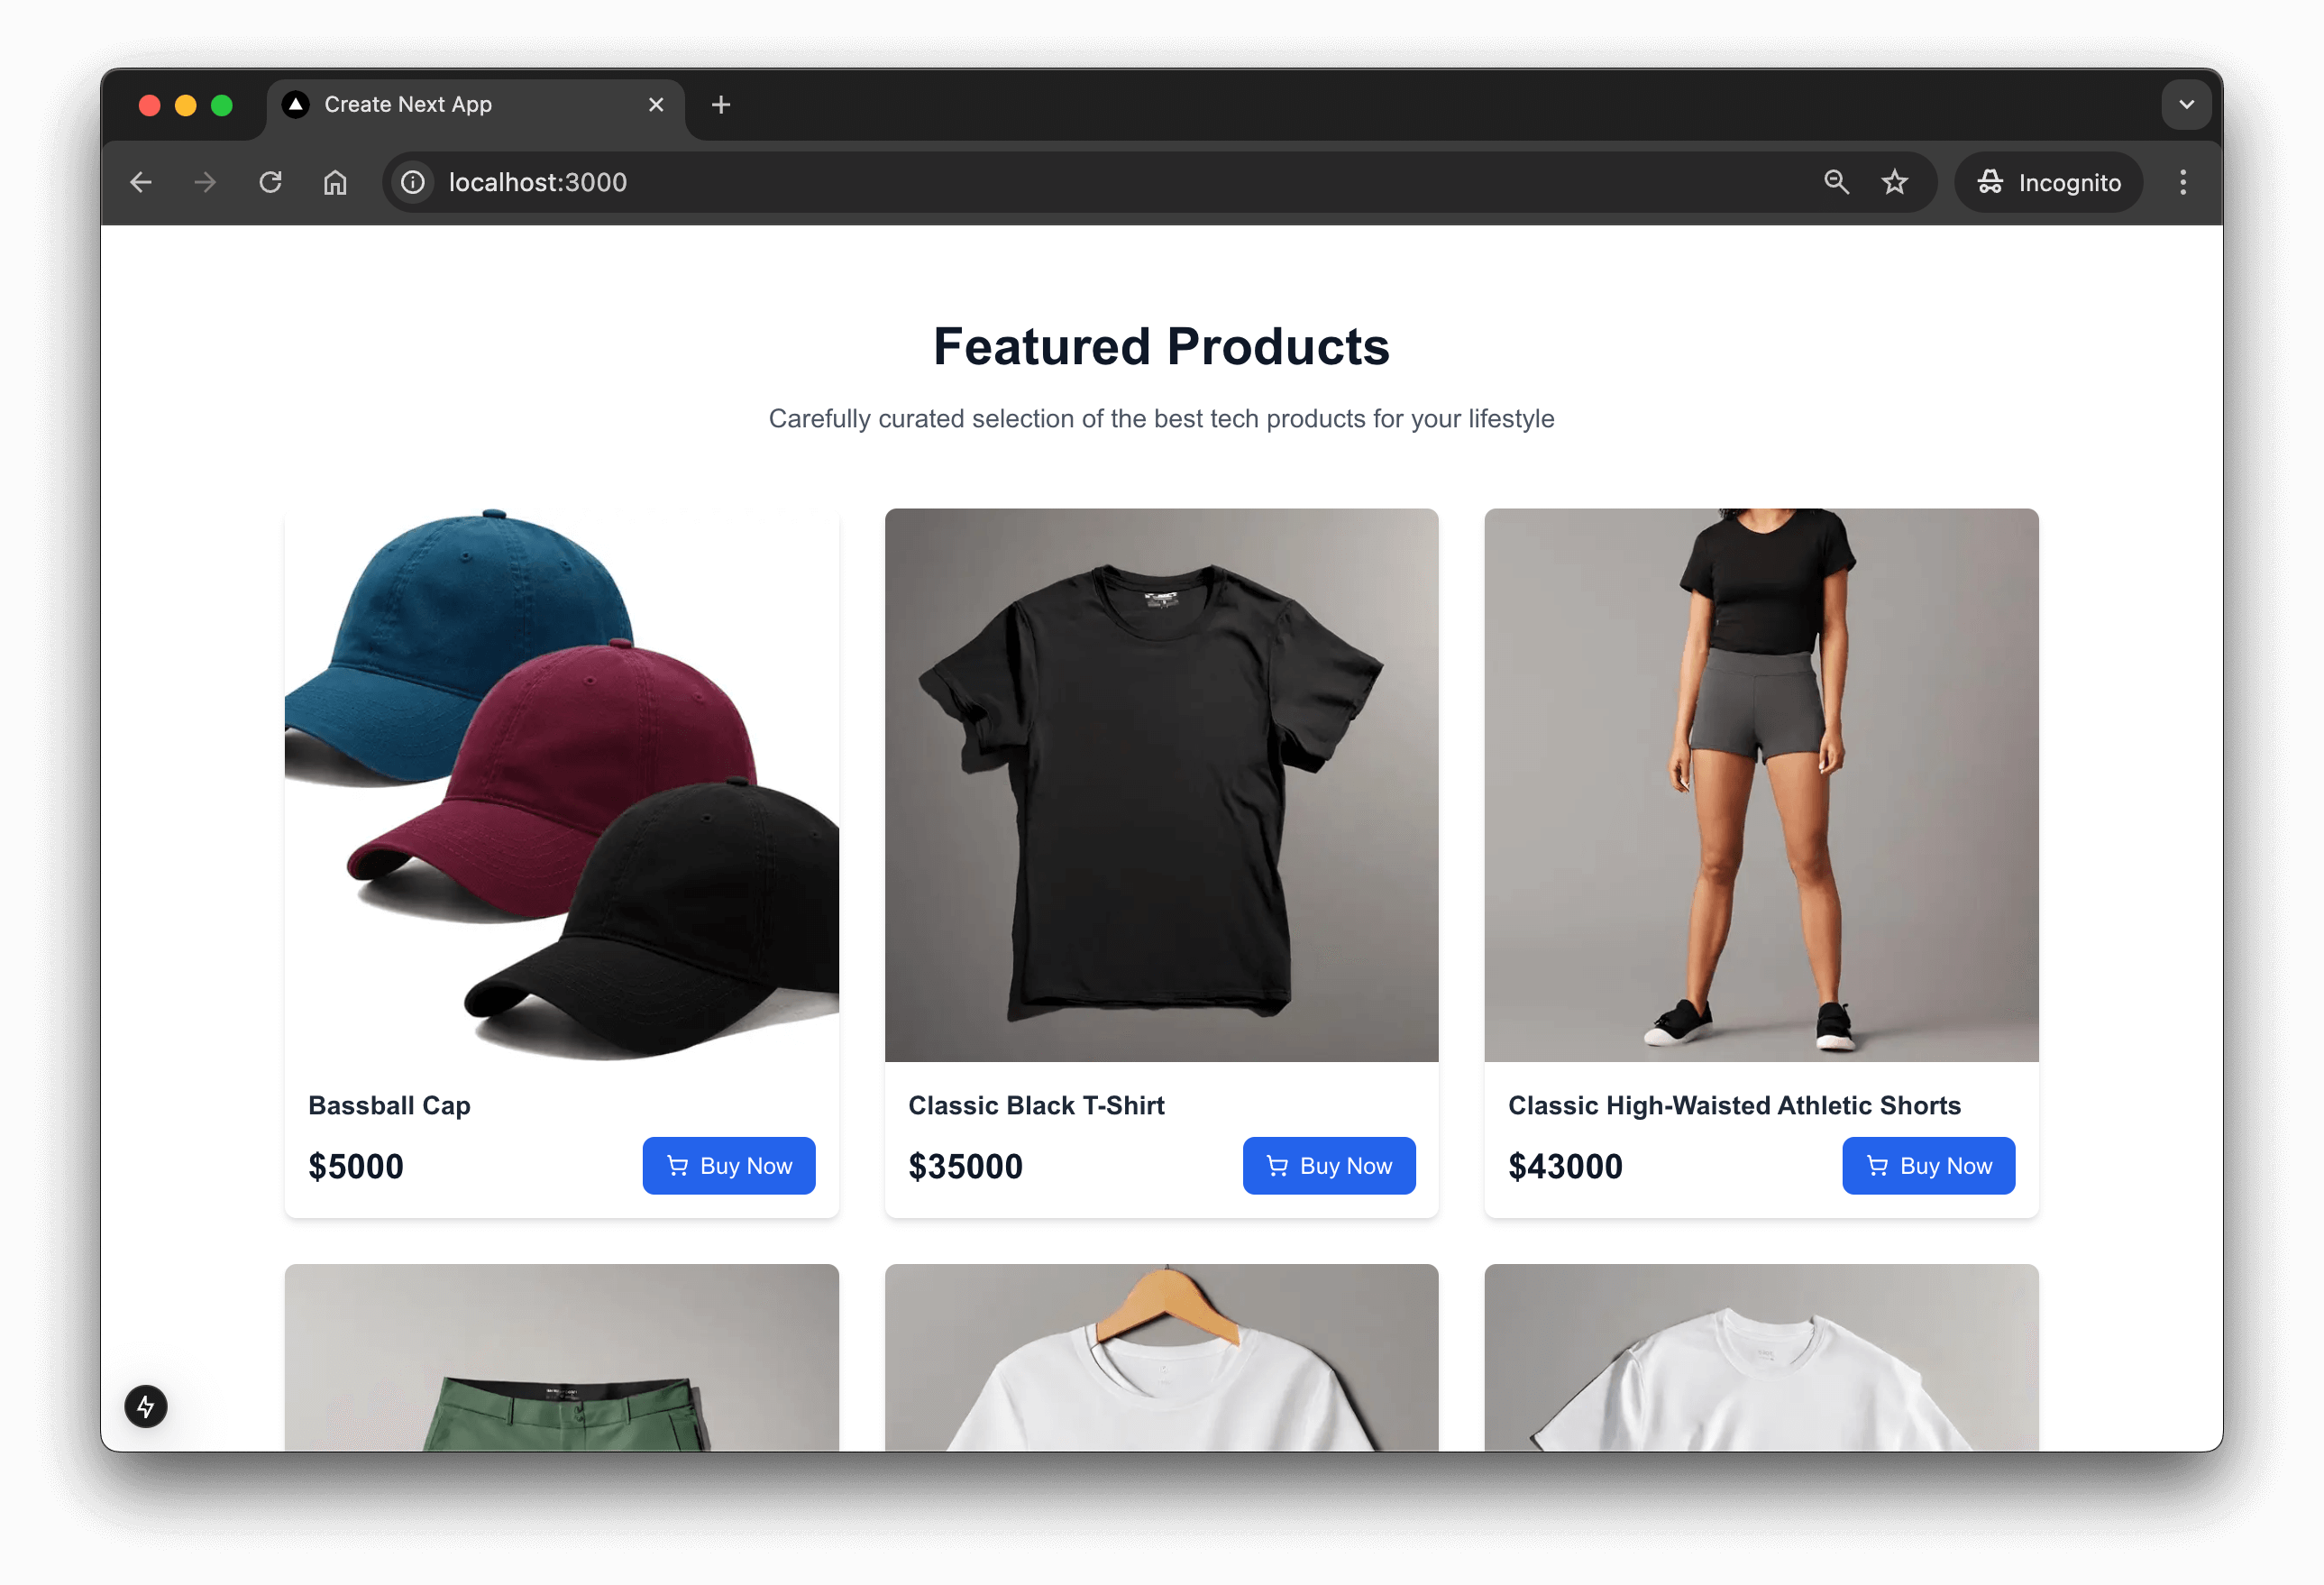
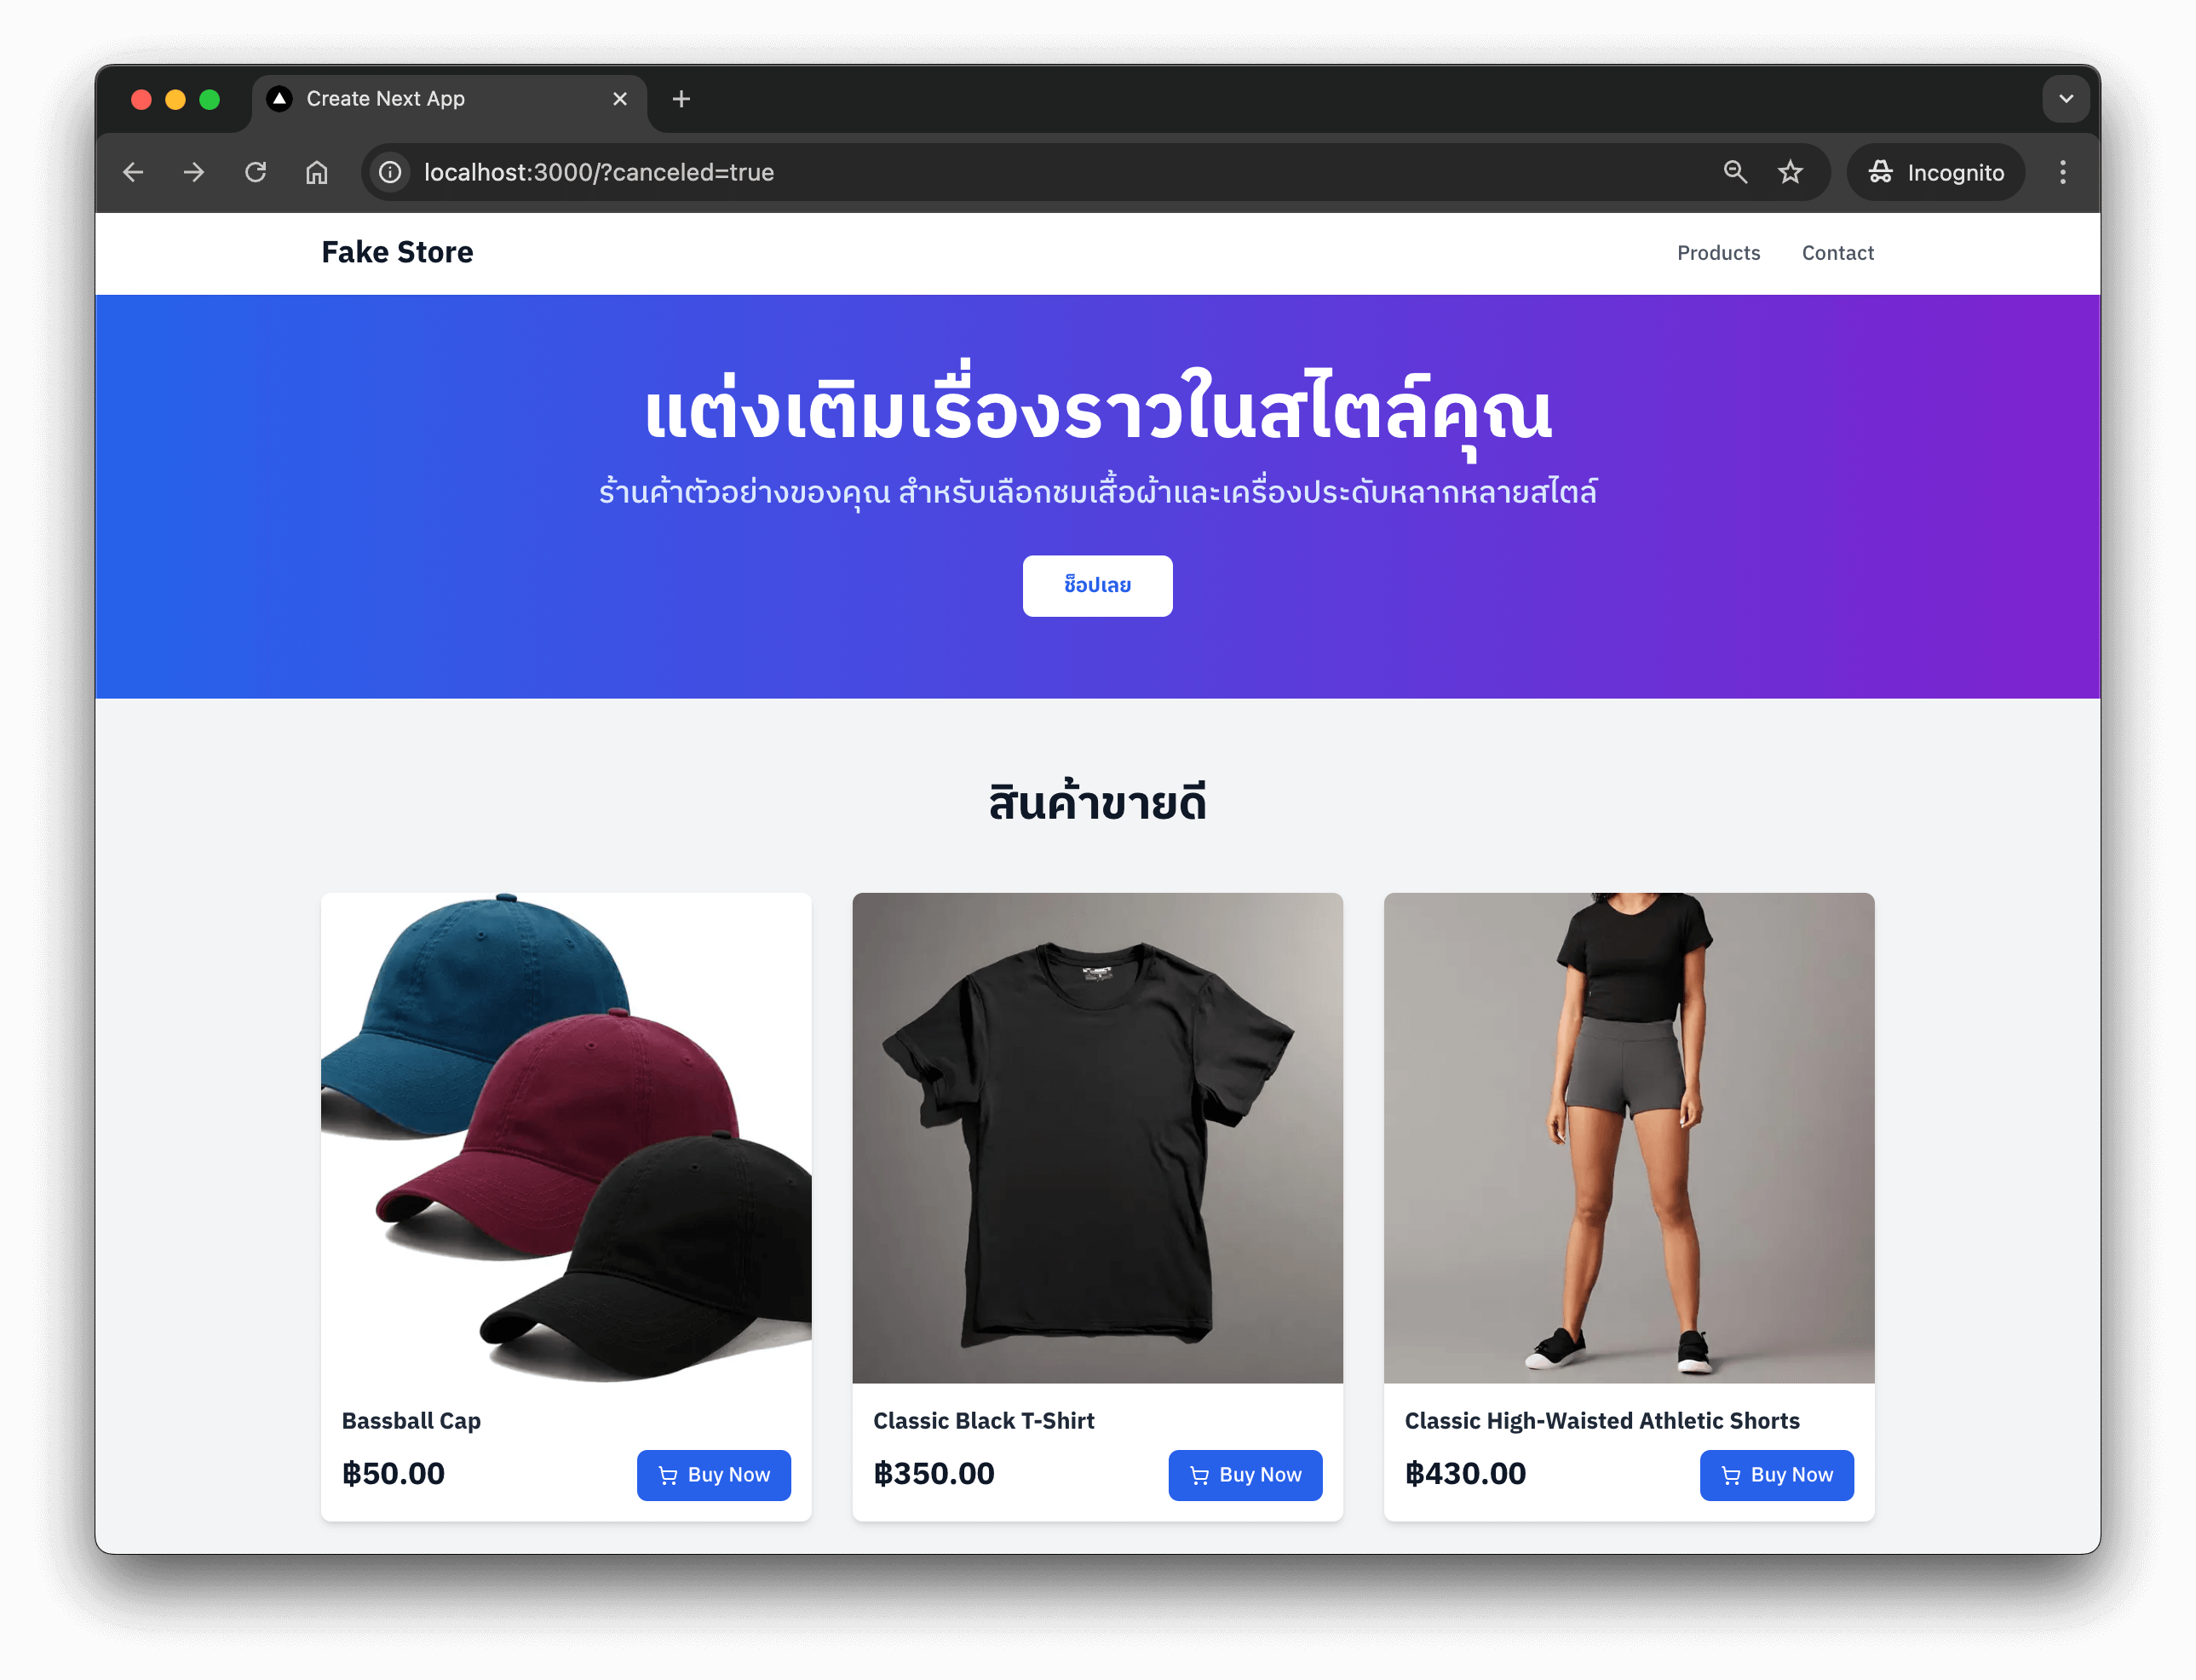
@tailwind base;@tailwind components;@tailwind utilities;ทดลองดูหน้าเว็บเรา จะเห็นว่าหน้าเว็บ สามารถที่จะแสดงข้อมูลสินค้า จาก Database มาแสดงได้ถูกต้อง แต่ยังกดซื้อไม่ได้นะ
Step 5: ทำ API Checkout
ต่อมา เราจะทำการเพิ่ม api สำหรับ ต่อกับ stripe checkout สำหรับ create checkout session ที่ไฟล์ src/app/api/checkout-session/route.ts

import { NextResponse } from 'next/server'import Stripe from 'stripe'
const STRIPE_SECRET_KEY = process.env.STRIPE_SECRET_KEY
if (!STRIPE_SECRET_KEY) {  throw new Error('Stripe secret key must be provided')}
const stripe = new Stripe(STRIPE_SECRET_KEY, {  apiVersion: '2025-04-30.basil',  typescript: true})
export async function POST(request: Request) {  try {    const { stripePriceId, price, productId, quantity = 1 } = await request.json()
    if (!stripePriceId || !price || !productId) {      return NextResponse.json(        { error: 'stripePriceId or price or productId is required' },        { status: 400 }      )    }
    const origin = request.headers.get('origin') || 'http://localhost:3000'
    const session = await stripe.checkout.sessions.create({      line_items: [        {          price: stripePriceId,          quantity        }      ],      metadata: {        productId,        price: price.toString(),        quantity: quantity.toString()      },      mode: 'payment',      success_url: `${origin}/payment-success?session_id={CHECKOUT_SESSION_ID}`,      cancel_url: `${origin}/?canceled=true`    })
    return NextResponse.json({ url: session.url })  } catch (err) {    const error = err as Error    console.error('Error creating Stripe session:', error.message)    return NextResponse.json({ error: error.message }, { status: 500 })  }}
ตัว api checkout-session เราจะรับ body payload 3 ค่า คือ stripePriceId, productId และ price โดย stripePriceId เป็นค่าที่ต้องใช้ ในการสร้าง checkout session ส่วน price และ productId เป็น optional metadata แต่เราส่งไปด้วย เพื่อเอาไว้ใช้ตอน confirm transaction ตอนได้รับ stripe webhook อีกที (ใน metadata เราจะแปลง number เป็น string นะครับ)
จากนั้นกลับไปแก้หน้า ProductCard.tsx ให้ call มาที่ API นี้ เวลาที่เรากดปุ่ม Buy Now function handleBuyProduct เราจะรับ product ที่เราเก็บไว้ใน database เพื่อส่งไป api/checkout-session
import { redirect } from 'next/navigation'
const ProductCard: React.FC<ProductCardProps> = ({ product }) => {  const handleBuyProduct = async () => {    const { id: productId, price, stripe_price_id: stripePriceId } = product
    const response = await fetch('/api/checkout-session', {      method: 'POST',      headers: {        'Content-Type': 'application/json'      },      body: JSON.stringify({ stripePriceId, productId, price })    })
    if (!response.ok) {      const errorData = await response.json()      console.error('Failed to create checkout session:', errorData)      alert(`เกิดข้อผิดพลาดในการเริ่มการชำระเงิน: ${errorData.error || response.statusText}`)      return    }
    const { url, error } = await response.json()
    if (error) {      console.error('Stripe redirection error:', error)      alert(`เกิดข้อผิดพลาดในการเปิดหน้าชำระเงิน: ${error.message}`)    }
    redirect(url)  }
  return (    // ...  )}
ส่วนปุ่ม Buy Now ก็เพิ่ม onClick ลงไป เพื่อมาเรียก handleBuyProduct
<button onClick={handleBuyProduct}> <ShoppingCart className="h-4 w-4" /> Buy Now</button>ทำการทดสอบซักเล็กน้อย เราลองคลิ๊ก ซัก product มันจะเด้งไปหน้า stripe เพื่อกรอกข้อมูล รายละเอียด
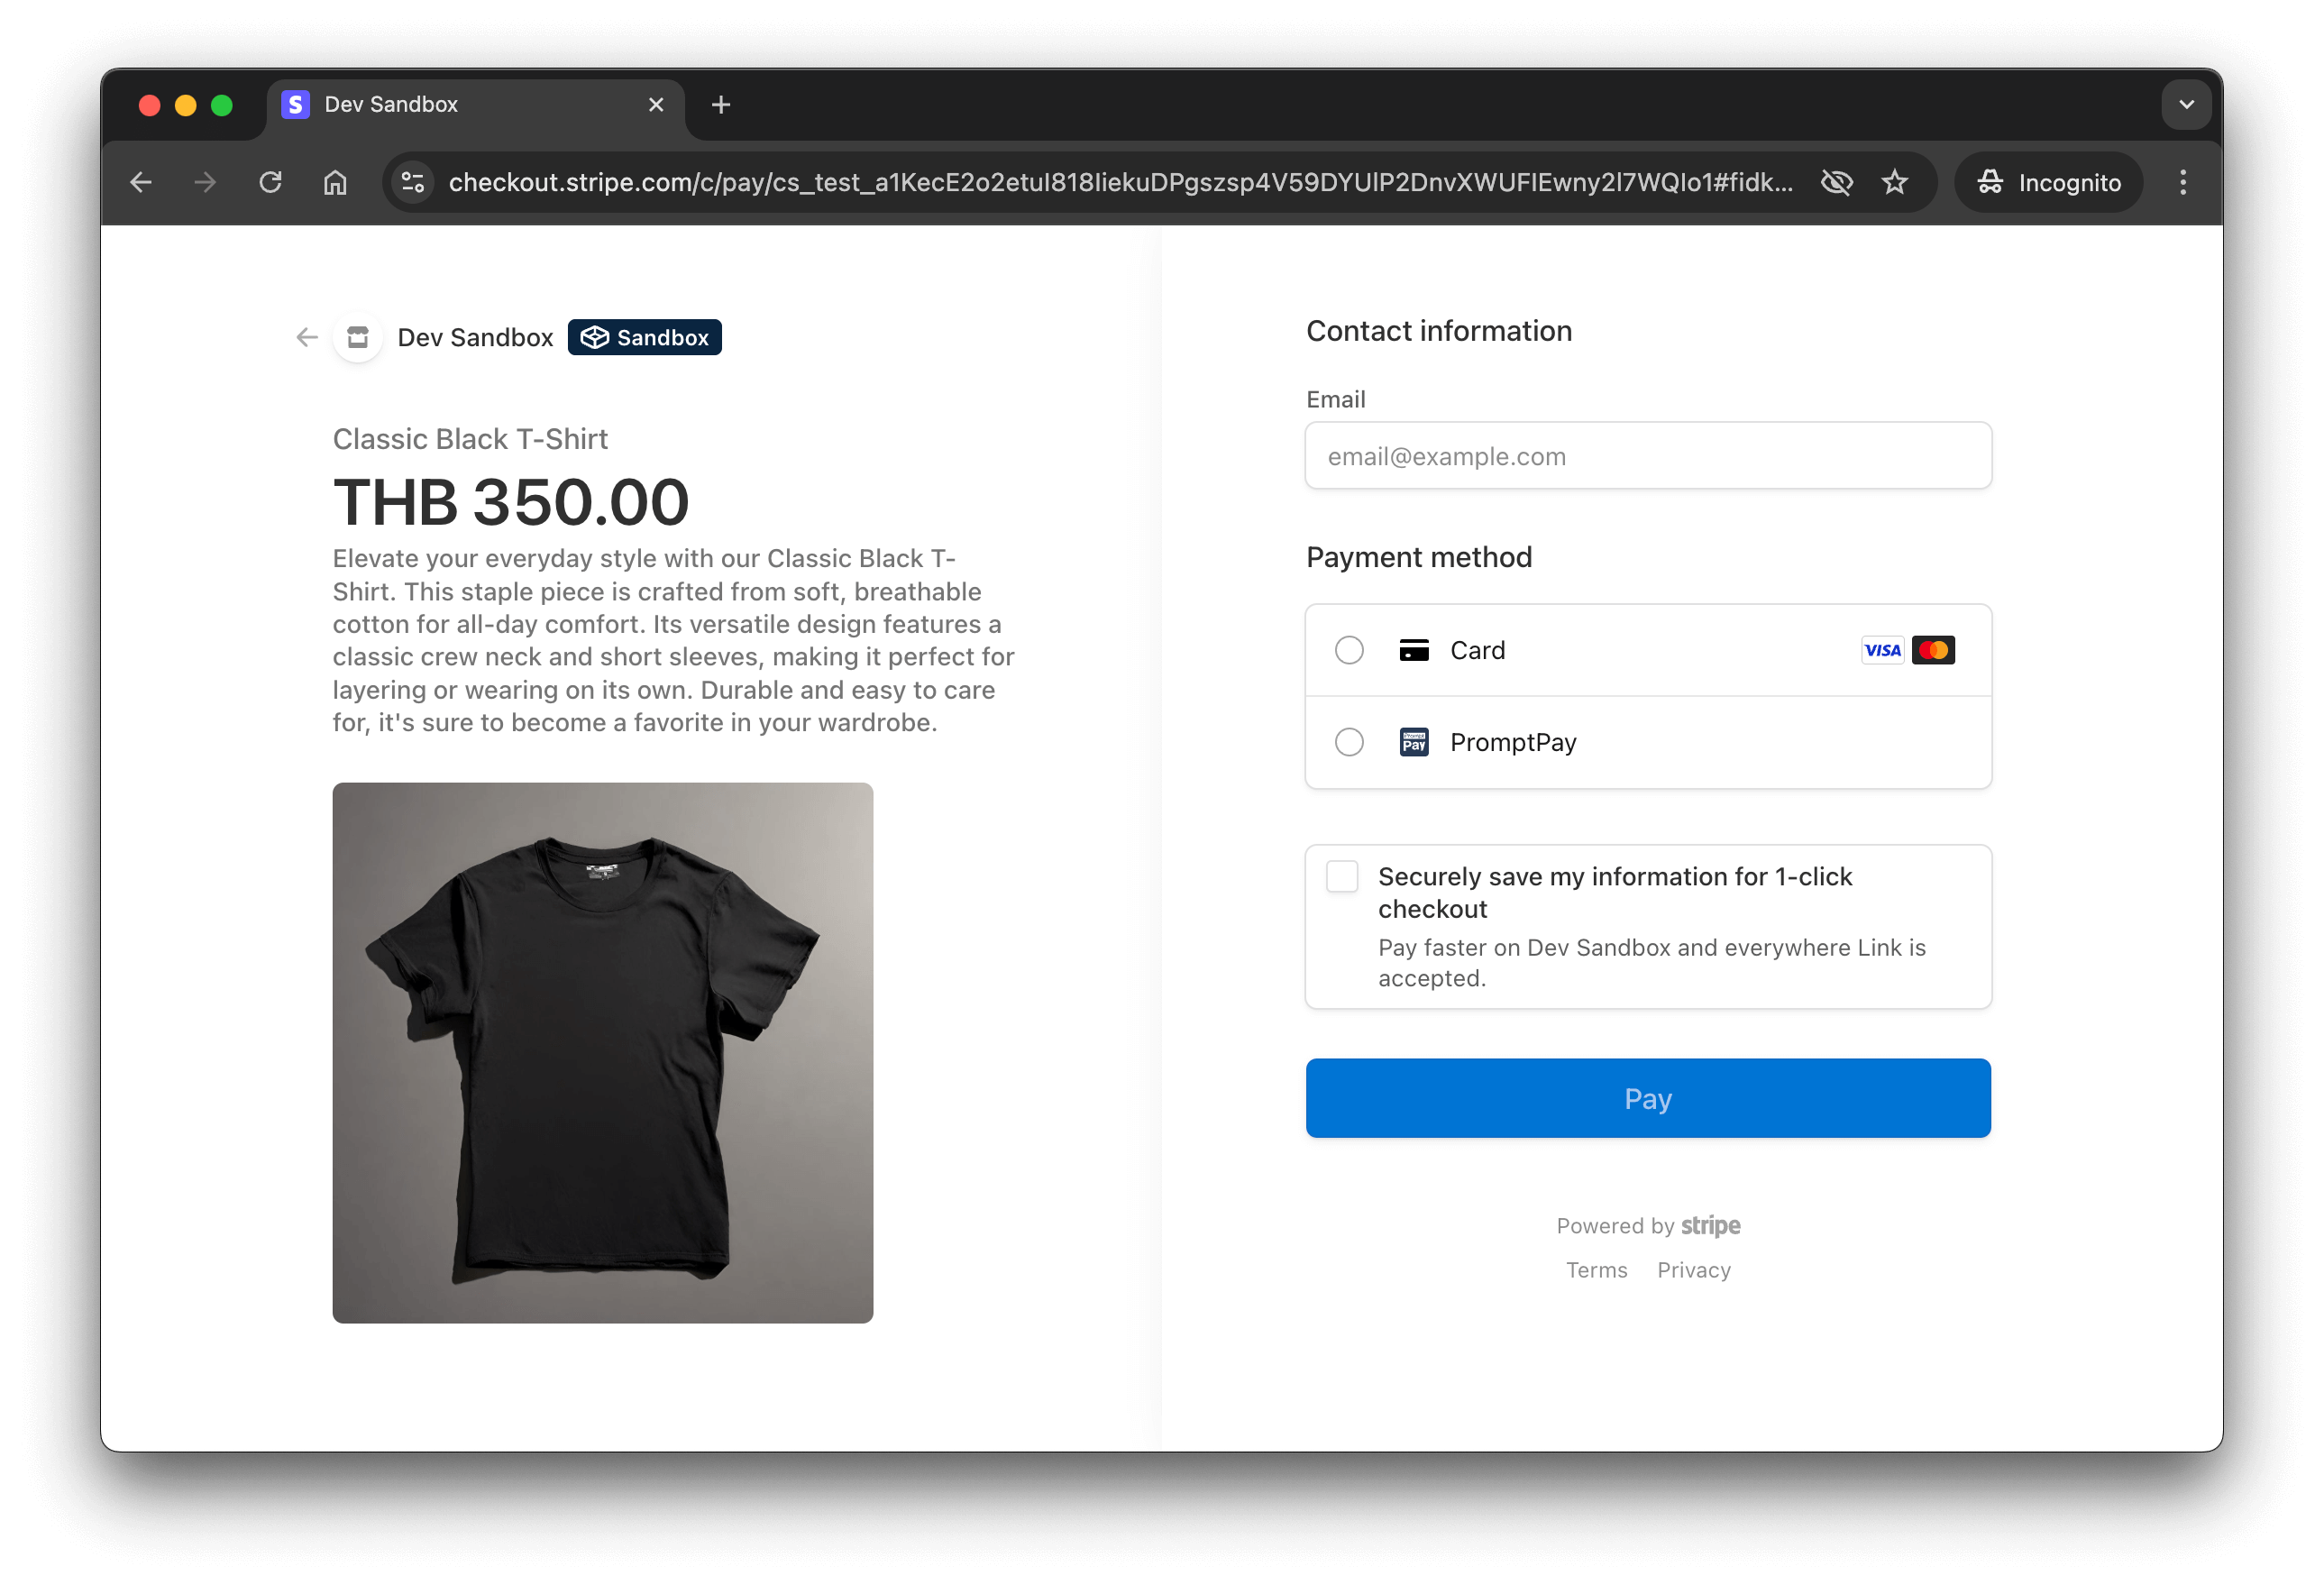
เราลองใส่ credit card เทสได้ครับ (เนื่องจาก stripe เรายังเป็น mode test หรือ sandbox อยู่)
Credit Card: 4242 4242 4242 4242
เมื่อเรา สั่งซื้อสินค้าถูกต้อง ระบบจะพาเราไปหน้า success ที่เราใส่ไว้ใน api checkout-session ก็คือ /payment-success นั่นเอง เราก็ทำหน้ามาง่ายๆ ว่า Payment Successful
import type { NextPage } from 'next'import Head from 'next/head'
const PaymentSuccess: NextPage = () => {  return (    <div className="container mx-auto p-4 text-center">      <Head>        <title>Payment Successful</title>      </Head>      <h1 className="mb-4 text-2xl font-bold">ชำระเงินเรียบร้อย</h1>    </div>  )}
export default PaymentSuccess
สรุป flow ขั้นตอนการทำงาน เวลาที่กด Buy Now จะเป็นแบบนี้
- เรียกไป
POST api/checkout-sessionโดยส่งstripe_price_idไปด้วย - ทำการสร้าง Stripe checkout session
- เมื่อสร้างเสร็จ Stripe จะ redirect ไปหน้าชำระเงินของ Stripe
- เมื่อเราชำระเงิน เรียบร้อย จะถูก redirect กลับมา url ที่เรากำหนดไว้
เมื่อถึงตรงนี้แสดงว่า Stripe ชำระเงิน เสร็จสิ้น แต่ว่าระบบเรา ยังไม่รู้ว่ามี order เข้ามา ขั้นตอนต่อไป ก็คือรับ webhook เพื่อให้รู้ว่า ลูกค้า ทำการซื้อเสร็จเรียบร้อยแล้ว
Step 6: Stripe Webhook
ขั้นตอนนี้ จะเป็นการเตรียม api เอาไว้เพื่อไว้รับ webhook ที่ stripe จะส่งมาหลังจากที่ transaction confirm แล้ว
ทำการสร้างไฟล์ app/api/stripe-webhooks/route.ts ขึ้นมา ขั้นตอนต่างๆ คือ
- เช็ค signature ก่อนว่าเป็น event ที่มาจาก stripe จริงๆ
- ถ้าผ่านแล้ว เราก็จะเอาแค่ event
checkout.session.completedเท่านั้น - ทำการ insert new order และเก็บค่า
stripe_checkout_session_id
import { NextResponse } from 'next/server'import Stripe from 'stripe'import { supabase } from '@/lib/supabase-client'
const STRIPE_SECRET_KEY = process.env.STRIPE_SECRET_KEY || ''const STRIPE_WEBHOOK_SECRET = process.env.STRIPE_WEBHOOK_SECRET || ''
if (!STRIPE_SECRET_KEY || !STRIPE_WEBHOOK_SECRET) {  throw new Error('Stripe secret key must be provided')}
// Initialize Stripeconst stripe = new Stripe(STRIPE_SECRET_KEY, {  apiVersion: '2025-04-30.basil',  typescript: true})
export async function POST(request: Request) {  try {    const rawBody = await request.text() // Get raw body    const signature = request.headers.get('stripe-signature') as string
    let event: Stripe.Event
    try {      event = stripe.webhooks.constructEvent(rawBody, signature, STRIPE_WEBHOOK_SECRET)    } catch (err) {      const error = err as Error      console.error(`Webhook signature verification failed: ${error.message}`)      return NextResponse.json({ error: `Webhook Error: ${error.message}` }, { status: 400 })    }
    // Handle the event    switch (event.type) {      case 'checkout.session.completed':        const session = event.data.object as Stripe.Checkout.Session        console.log(`Payment successful for session ID: ${session.id}`)
        const totalAmount = (session.amount_total ?? 0) / 100
        try {          const productId = session.metadata?.productId          const quantity = session.metadata?.quantity
          // 1. Find product in Supabase          const { data: productData, error: productError } = await supabase            .from('products')            .select('id, price')            .eq('id', productId)            .maybeSingle()
          if (productError || !productData) {            console.error('Supabase error ', productError)
            return NextResponse.json({ error: 'Webhook Error: Product not found' }, { status: 404 })          }
          // 2. Create Order record in Supabase          const { error: orderError } = await supabase.from('orders').insert([            {              product_id: productData.id,              quantity: quantity || 1,              total_amount: totalAmount,              status: 'paid',              stripe_checkout_session_id: session.id            }          ])
          if (orderError) {            console.error('Error inserting order into Supabase:', orderError)            return NextResponse.json(              { error: `Webhook Error: ${orderError.message}` },              { status: 500 }            )          }
          console.log(`Order created successfully for session: ${session.id}`)        } catch (dbError) {          const dErr = dbError as Error          console.error('Database operation error:', dErr.message)          return NextResponse.json({ error: `Webhook Error: ${dErr.message}` }, { status: 500 })        }        break
      default:        console.warn(`Unhandled event type ${event.type}`)    }
    return NextResponse.json({ received: true })  } catch (error) {    console.error('Error processing webhook:', error)    return NextResponse.json({ error: 'Internal Server Error processing webhook' }, { status: 500 })  }}
Step 7: Stripe Webhook local
ทดสอบ webhook บน local ด้วย stripe CLI เราจะมาลองเทสดูว่า โค๊ดที่เราเขียนถูกต้องหรือไม่ ทำการติดตั้ง stripe cli ก่อน
# brewbrew install stripe/stripe-cli/stripe
# scoopscoop bucket add stripe https://github.com/stripe/scoop-stripe-cli.gitscoop install stripe
วิธีการติดตั้ง Stripe CLI ใน OS อื่นๆ
หากเราติดตั้ง CLI ถูกต้อง เราจะสามารถใช้คำสั่ง stripe ได้ ลองเช็ค version
stripe versionจะได้ผลลัพธ์เป็น version เช่น ณวันที่เขียนบทความ 1.27.0
stripe version 1.27.0ทำการ login
stripe loginกด Enter จากนั้น ให้เราเลือก account เช่น Test mode/ sandbox mode ทำการกด Allow เพื่ออนุญาต จะเห็นข้อความยืนยันว่า login เรียบร้อยแล้ว
Done! The Stripe CLI is configured for <YOUR_ACCOUNT> with account id <acc_id>ทำการ forward events มาที่ webhook ของเรา ที่สร้างไว้
stripe listen --forward-to localhost:3000/api/stripe-webhooksจะได้ค่า webhook signing secret ประมาณนี้
> Ready! You are using Stripe API Version [2023-08-16]. Your webhook signing secret is whsec_YOUR_SIGNING_SECRET_FROM_STRIPE_CLI (^C to quit)^C%นำค่าจาก Stripe CLI ไปใส่ใน .env ของเรา
STRIPE_WEBHOOK_SECRET=whsec_YOUR_SIGNING_SECRET_FROM_STRIPE_CLIทดสอบ flow การทำงานอีกครั้ง ลองทำผ่าน CLI ก็ได้ เช่น
stripe trigger checkout.session.completedจะเห็นว่าตัว stripe webhook forward ที่เปิดไว้อีก Terminal มี log แสดง และก็ในเว็บเรา จะมี event เข้ามา และได้ error ตามที่ดักไว้ (เนื่องจากตอนกด test trigger เราจะไม่ได้ส่ง metadata ไปเหมือนกับตอนซื้อหน้าเว็บ)
ลองกดซื้อหน้าเว็บ ดูว่าได้รับ webhook มั้ย ถ้าได้ ก็จะได้มี order เซฟใน database
ใน Production สร้าง webhook ไปที่ Stripe dashboard โดยเลือก Endpoint URL เป็น domain จริงๆ ครับ เช่น https://your-domain.com/api/stripe-webhooks และเลือก event ที่เราต้องการเพิ่มเติมได้ เช่น
checkout.session.completedpayment_intent.succeededpayment_intent.payment_failed
เพียงเท่านี้ เราก็สามารถ มีระบบซื้อขายบนเว็บของเราได้แล้ว
Step 8: ปรับแต่ง UI
ขั้นตอนนี้ไม่ลง detail มากครับ เป็นแค่การจัด UI เล็กๆน้อยๆ logic ยังคงเหมือนเดิม มีเพียงการเพิ่ม className ลงไป โดยใช้ Tailwind CSS ที่ติดตั้งมาตั้งแต่ เรา init Next ละครับ สามารถ copy หรือดูผลลัพธ์สุดท้ายได้เลย
โดยเราจะแบ่ง components แยกเป็น Navbar, Hero, Footer และ ProductCard
ส่วน Navbar.tsx
const Navbar = () => {  return (    <header className="sticky top-0 z-10 bg-white shadow-sm">      <div className="mx-auto max-w-7xl px-4 sm:px-6 lg:px-8">        <div className="flex h-16 items-center justify-between">          <div className="flex items-center">            <h1 className="text-2xl font-bold text-zinc-900">Fake Store</h1>          </div>
          <nav className="hidden space-x-8 md:flex">            <a href="#" className="font-medium text-zinc-600 hover:text-zinc-900">              Products            </a>
            <a              href="https://www.devahoy.com"              className="font-medium text-zinc-600 hover:text-zinc-900"              target="_blank"            >              Contact            </a>          </nav>        </div>      </div>    </header>  )}
export default Navbar
ไฟล์ Hero.tsx
const Hero = () => {  return (    <section className="bg-gradient-to-r from-blue-600 to-purple-700 text-white">      <div className="mx-auto max-w-7xl px-4 py-16 sm:px-6 lg:px-8">        <div className="text-center">          <h2 className="mb-4 text-4xl font-bold md:text-6xl">แต่งเติมเรื่องราวในสไตล์คุณ</h2>          <p className="mb-8 text-xl text-blue-100 md:text-2xl">            ร้านค้าตัวอย่างของคุณ สำหรับเลือกชมเสื้อผ้าและเครื่องประดับหลากหลายสไตล์          </p>          <button className="cursor-pointer rounded-lg bg-white px-8 py-3 font-semibold text-blue-600 transition-colors duration-200 hover:bg-zinc-100">            ช็อปเลย          </button>        </div>      </div>    </section>  )}
export default Hero
ไฟล์ Footer.tsx
const Footer = () => { return ( <footer className="bg-zinc-900 text-white"> <div className="mx-auto max-w-7xl px-4 py-12 sm:px-6 lg:px-8"> <div className="text-center text-zinc-300"> <p> © 2025 FakeStore. อ่านบทความเต็มที่ :{' '} <a href="https://github.com/phonbopit/eshop" className="underline underline-offset-2" target="_blank" > ทำระบบเว็บขายของ E-commerce </a> </p> </div> </div> </footer> )}
export default Footerหน้า ProductCard ตรงส่วนที่แสดงราคา ก็ปรับให้มันเป็น TH ซะ แบบนี้
{ new Intl.NumberFormat('th-TH', { style: 'currency', currency: 'THB' }).format(product.price / 100)}หน้า src/app/layout.tsx ปรับแต่งแบบนี้
import type { Metadata } from 'next'import { IBM_Plex_Sans_Thai } from 'next/font/google'import './globals.css'import Navbar from '@/components/Navbar'import Footer from '@/components/Footer'import Hero from '@/components/Hero'
const ibmPlex = IBM_Plex_Sans_Thai({  subsets: ['thai'],  weight: ['300', '500', '700'],  display: 'swap'})
export const metadata: Metadata = {  title: 'Create Next App',  description: 'Generated by create next app'}
export default function RootLayout({  children}: Readonly<{  children: React.ReactNode}>) {  return (    <html lang="en">      <body className={`${ibmPlex.className} antialiased`}>        <div className="min-h-screen bg-zinc-100">          <Navbar />          <Hero />          {children}          <Footer />        </div>      </body>    </html>  )}
🎉เสร็จเรียบร้อยครับ!
เนื้อหาเพิ่มเติม
โค๊ดในบล็อกนี้เป็นเพียงแค่แนวทางศึกษาเท่านั้น ยังไม่ดีพอที่จะเอาไปใช้งาน Production นะครับ ยังขาดในหลายเรื่อง ลองประยุกต์เพิ่ม feature ให้มากขึ้น แก้โค๊ดให้ดีขึ้น เช่น
- เพิ่ม Row Level Security (RLS) ใน Supabase ให้มีความปลอดภัย
- ระบบ User Authentication โดยใช้ Supabase Auth เพื่อให้ลูกค้าสมัครและ login ได้ จากนั้น จัดเก็บ
user_idไว้ในตารางorders - ทำหน้าประวัติการสั่งซื้อ (My Orders) ดึงข้อมูลจาก database มาแสดง
- ทำหน้าตระกร้าสินค้า โดยใช้ Zustand หรือ Context API (เฉพาะ client)
- หรือทำตระกร้าสินค้า แล้วเก็บข้อมูลไว้ฝั่ง Server
- ส่ง Email ยืนยันการสั่งซื้อ จัดการ UX/UI ทำ Error handling ให้ดียิ่งขึ้น อื่นๆ
- หน้า confirm payment ให้เช็คสถานะสั่งซื้อด้วย (อาจส่ง session มากับ query url)
ตัวอย่าง Projects
บล็อกไว้อ่านเพิ่มเติม

สรุป
สำหรับบทความนี้ก็เป็นตัวอย่าง Overview คร่าวๆ ให้เห็นภาพการทำงานของระบบ การดึงรายการสินค้า การชำระเงิน โดยหลักๆ เราใช้ Stripe มาช่วยเรื่องของการชำระเงิน และใช้ Supabase เก็บข้อมูล สุดท้าย ใช้ Stripe webhook เอาไว้ยืนยัน order หรือสามารถเลือกรับ event อื่นๆ ที่เราต้องการได้
ย้ำอีกครั้ง! ตัวอย่างนี้ไม่ใช่ Production ready นะครับ ไม่ควรนำไปใช้งานจริง เอาไว้เป็นแนวทางศึกษาเท่านั้นนะครับ
หวังว่าบทความนี้จะทำให้เพื่อนๆ ได้พอเห็นภาพการทำงานอยู่บ้าง ไม่มากก็น้อย หากสงสัย ติดปัญหาตรงไหน สอบถามได้ครับ
Happy Coding ❤️
- Authors
-

Chai Phonbopit
Senior Software Engineer ประสบการณ์กว่า 12 ปี ด้าน Frontend: React, Next.js, Tailwind CSS และ Backend: Node.js, Express, NestJS ปัจจุบันสนใจ Astro, Cloudflare Workers และ AI Coding Tool